How To: Quickly View RAM, Data Usage & More in Your Android's Quick Settings Menu
Oftentimes, seemingly insignificant, nondescript features have the most impact on enhancing our Android's usability. A great example is Nougat's inclusion of customizable Quick Settings tiles, which adds greatly to the user experience by letting individuals tailor their expandable status bars to suit their unique needs.An awesome new app has arrived on the Play Store that lets you add a slew of custom toggles to Android's Quick Settings page. With this one installed, you can quickly view vital stats such as RAM and data usage by simply swiping down from the top of any screen. The app doesn't require root, but you'll need to run an ADB command to get these extra features, so I'll show you how to do it below.Don't Miss: The 5 Best Phones for Rooting & Modding
RequirementsAndroid Nougat installed Developer options and USB debugging enabled Windows, Mac, or Linux computer ADB and Fastboot installed USB data cable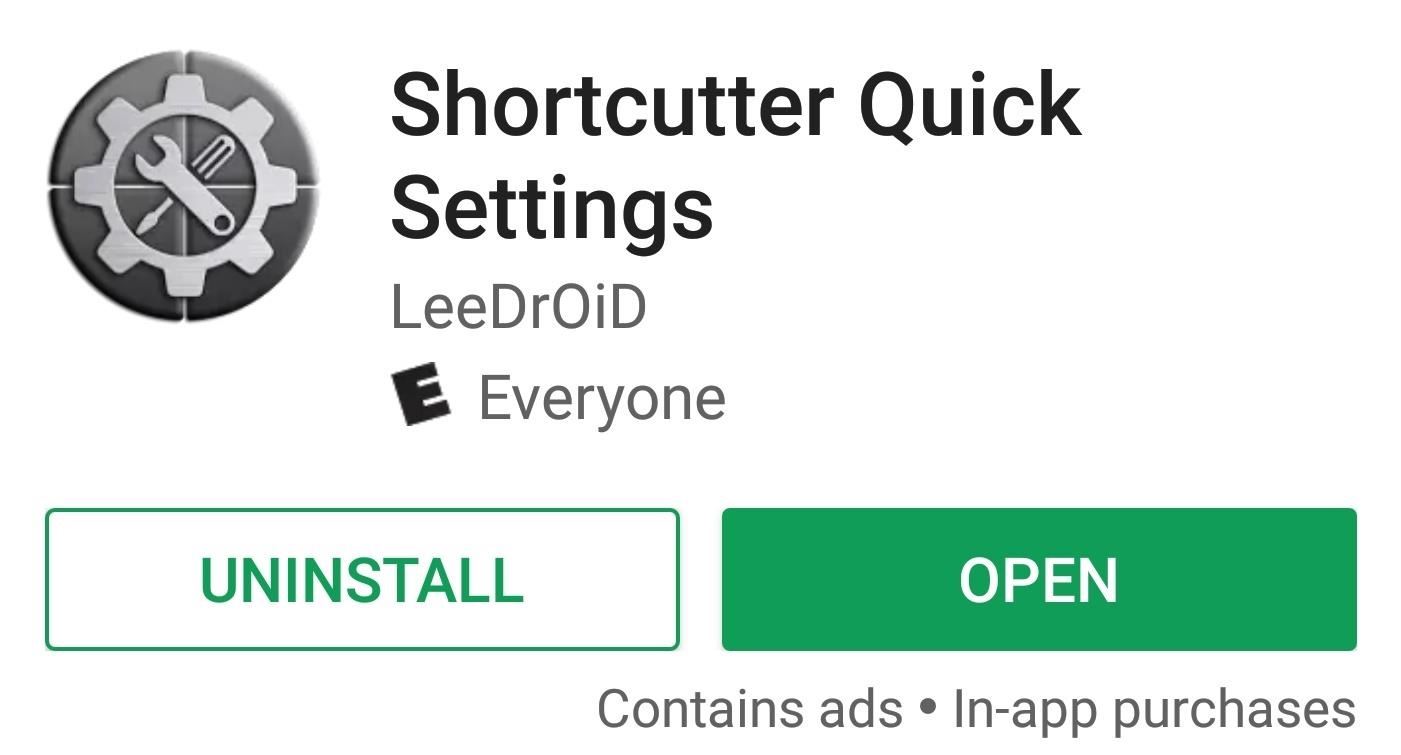
Step 1: Install Shortcutter Quick SettingsTo get started, go to the Play Store, or tap on the link provided below, and grab Shortcutter Quick Settings by LeeDrOiD. It's free to download, but purchasing the full version for $2.49 will unlock a handful of extra features, though these are not needed for the purposes of this guide.Install Shortcutter Quick Settings for free from the Google Play Store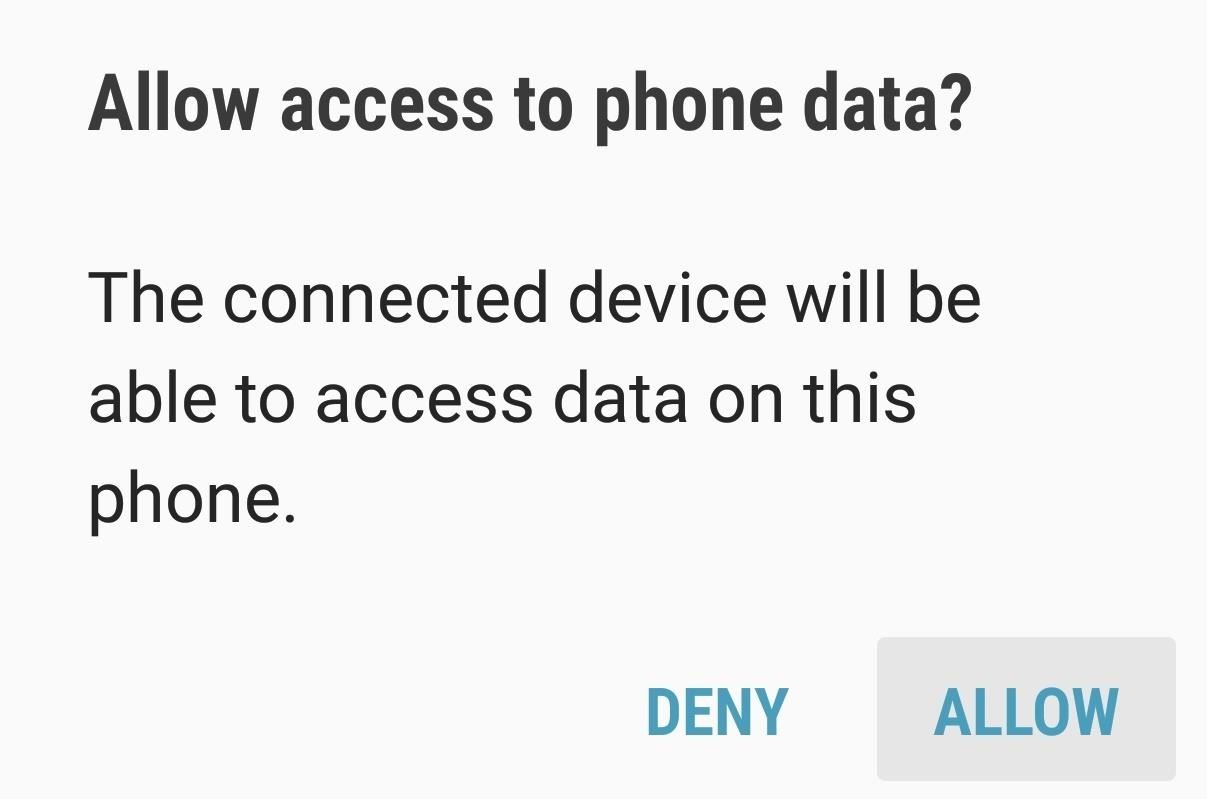
Step 2: Connect Your PhoneNext, connect your phone to your computer with a USB data cable. Tap the USB Computer Connection notification that appears on your phone and select "Transfer Files." After that, you'll get a popup asking you to let your computer access your phone, so press "Allow" here.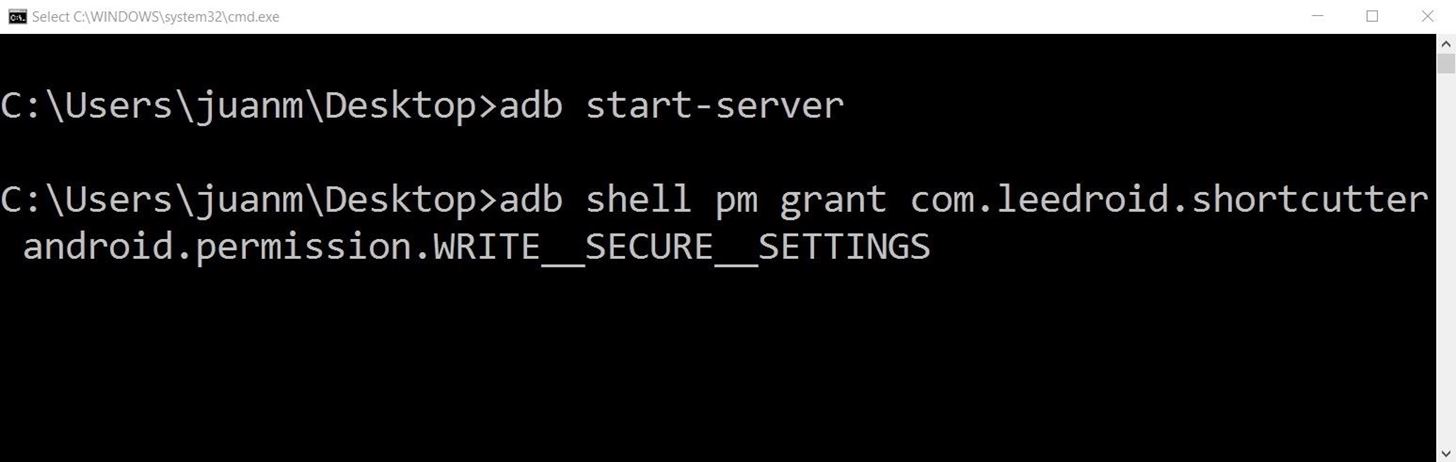
Step 3: Run ADBShortcutter Quick Settings needs to be granted an additional permission before it can add RAM and data usage tiles to your Quick Settings menu. In order to do that, you'll need to run a single ADB command if your device is unrooted.For Windows users, we recommend following this guide to make ADB work system-wide. Once you've done that, simply press the Windows button on your keyboard, then type in "cmd" and hit enter.For Mac and Linux users, you'll need to open a Terminal window, then change directories to the platform-tools folder inside of your ADB installation directory. This folder's location will vary depending on where you extracted ADB, so search your hard drive for "platform-tools" if you don't know where it is.Once ADB is open, enter the following command to grant the app permission to to allow for the inclusion of modified custom tiles:adb shell pm grant com.leedroid.shortcutter android.permission.WRITE_SECURE_SETTINGS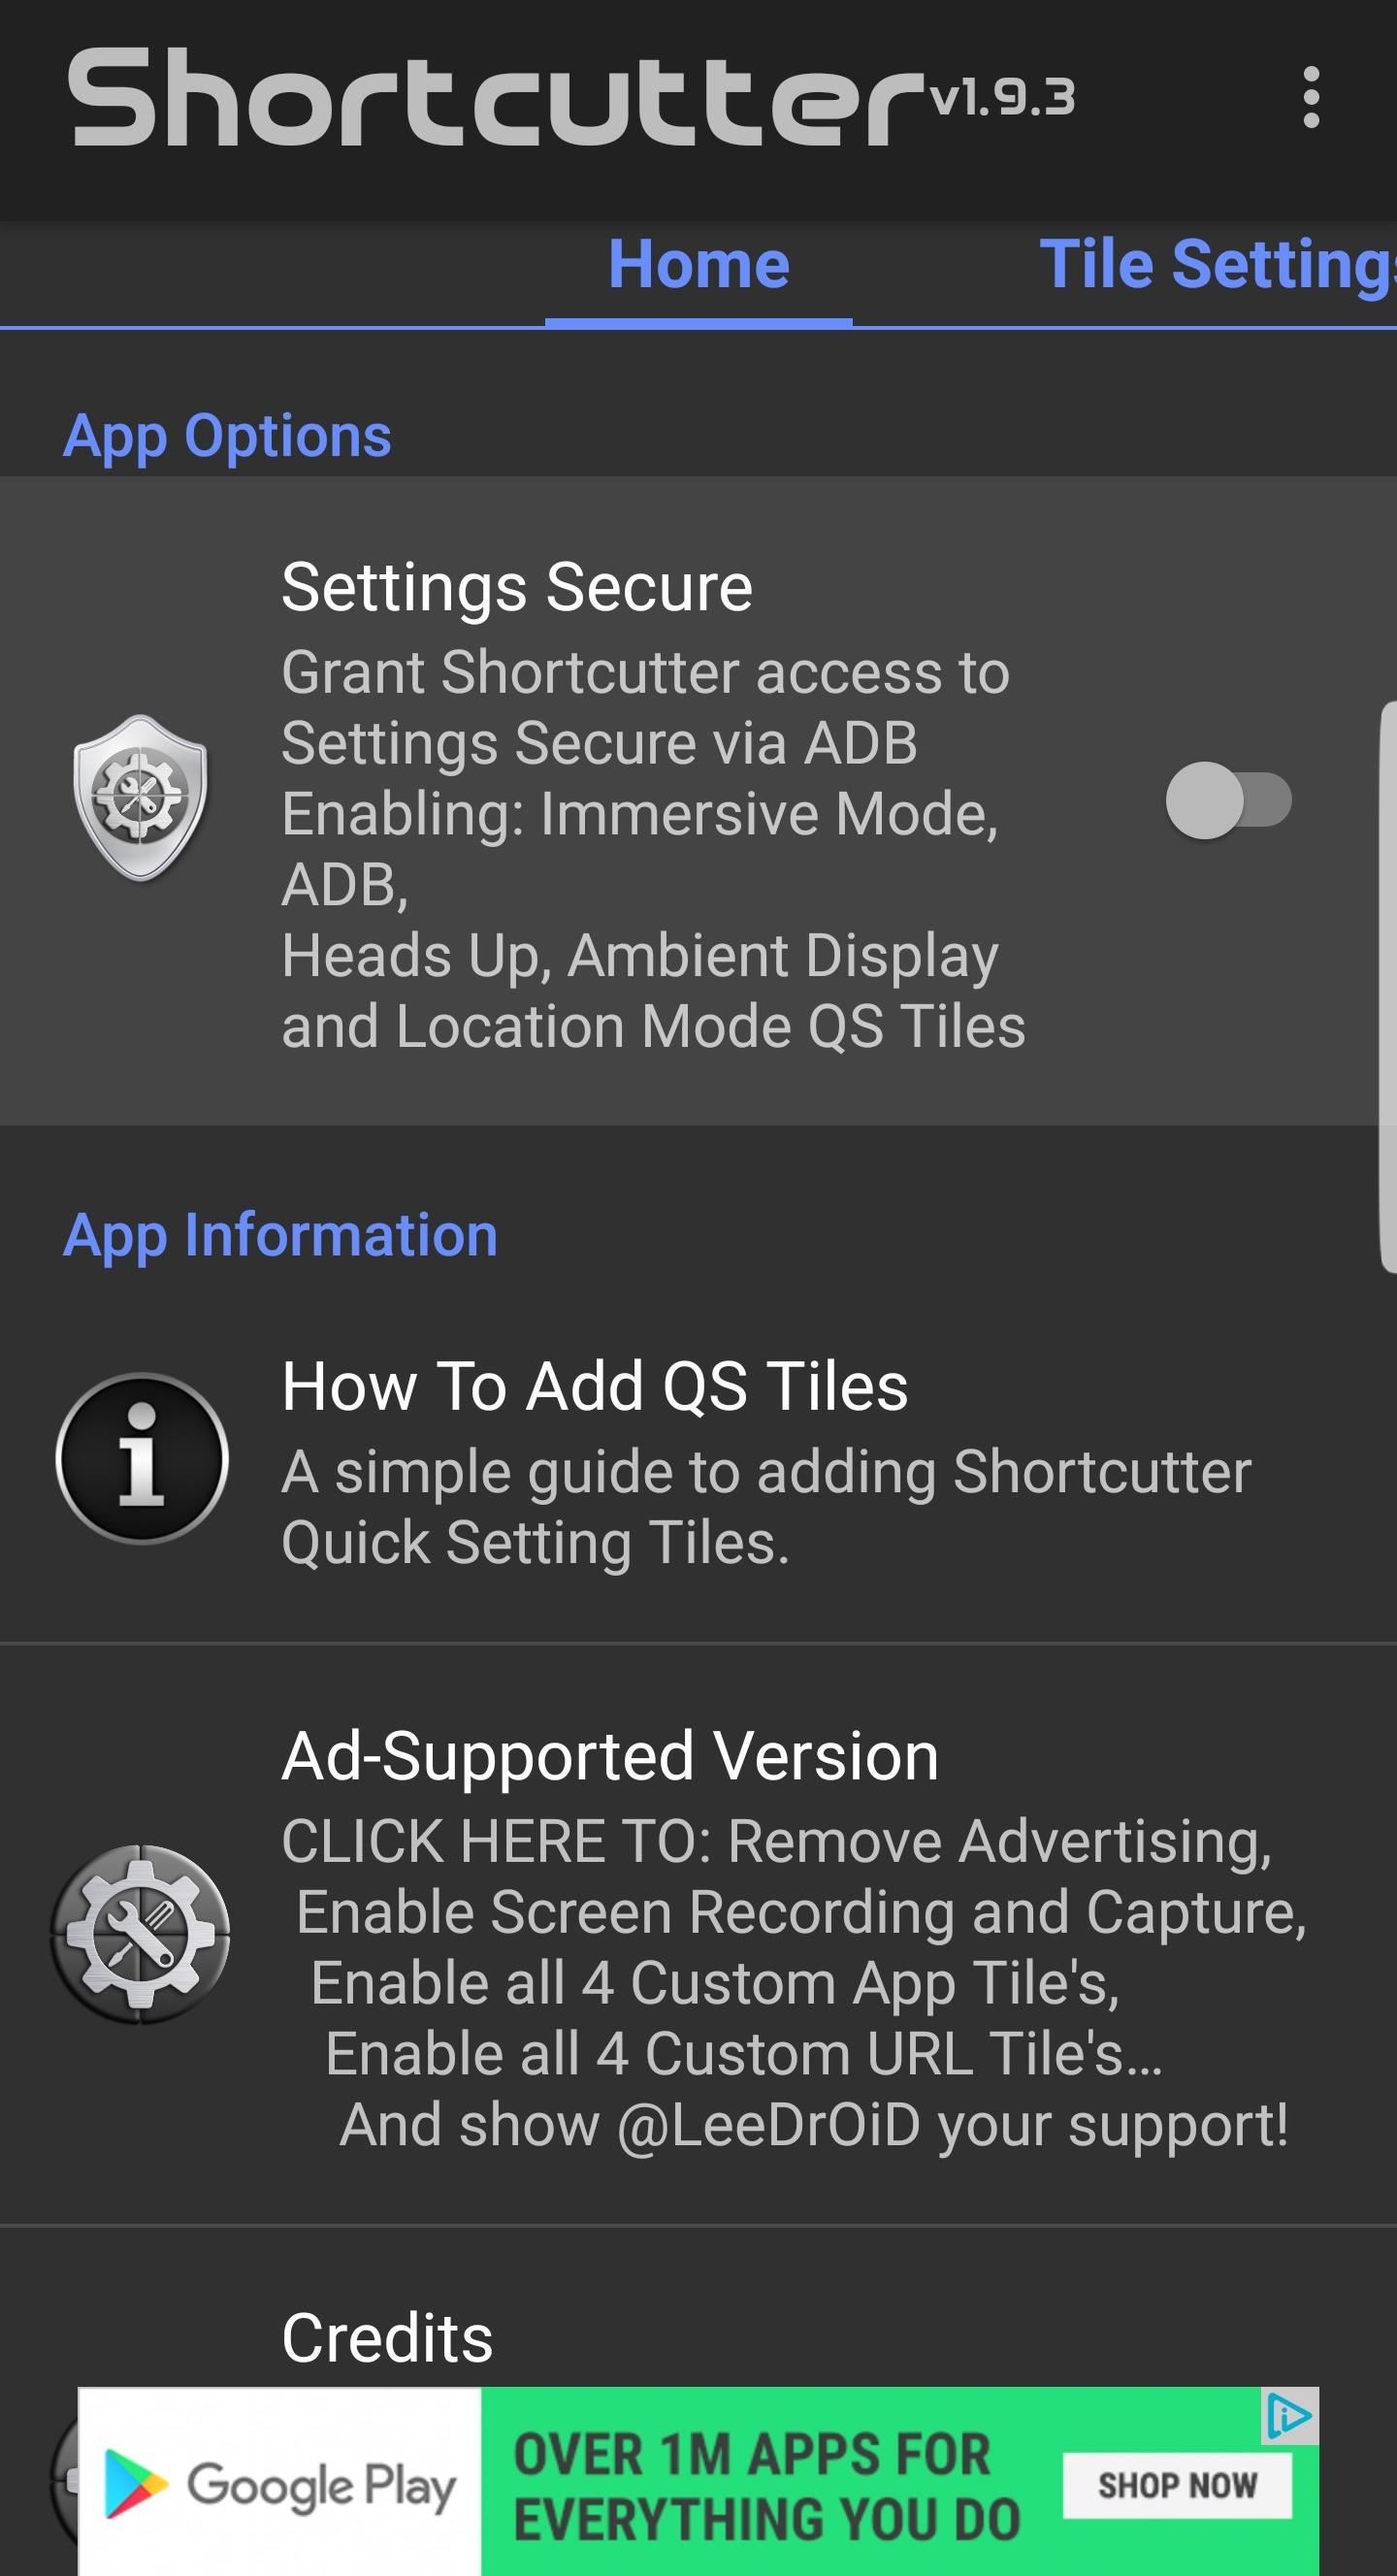
Step 4: Choose Your ShortcutsOnce you've successfully inputted the ADB command, unplug your phone from your computer. Open Shortcutter, turn on "Setting Secure," and tap on "Confirm" after the Action Required prompt appears. Don't worry about the prompt, as we already granted the app permission via ADB in the previous step. Now, swipe over to the Tile Settings tab. From there, simply enable the switch next to any Quick Settings tile you'd like to be able to add. Shortcutter has tons of useful tiles available, so we recommend going through the full list to see what you like.But if you're only interested in the RAM and data usage tiles, make sure to enable the switch next to "RAM tile." From there, scroll down and enable "Data Usage tile," then tap "Proceed" on the popup. After that, select Shortcutter from the list, then enable the switch next to "Permit usage access." Next, you'll need to let Shortcutter know when your billing cycle ends so it can give you an accurate depiction of your monthly data usage. To do that, head back to the app and tap "Data Usage Cycle" beneath the "Data Usage tile" option, then use the popup to select the day of the month when your monthly phone bill renews.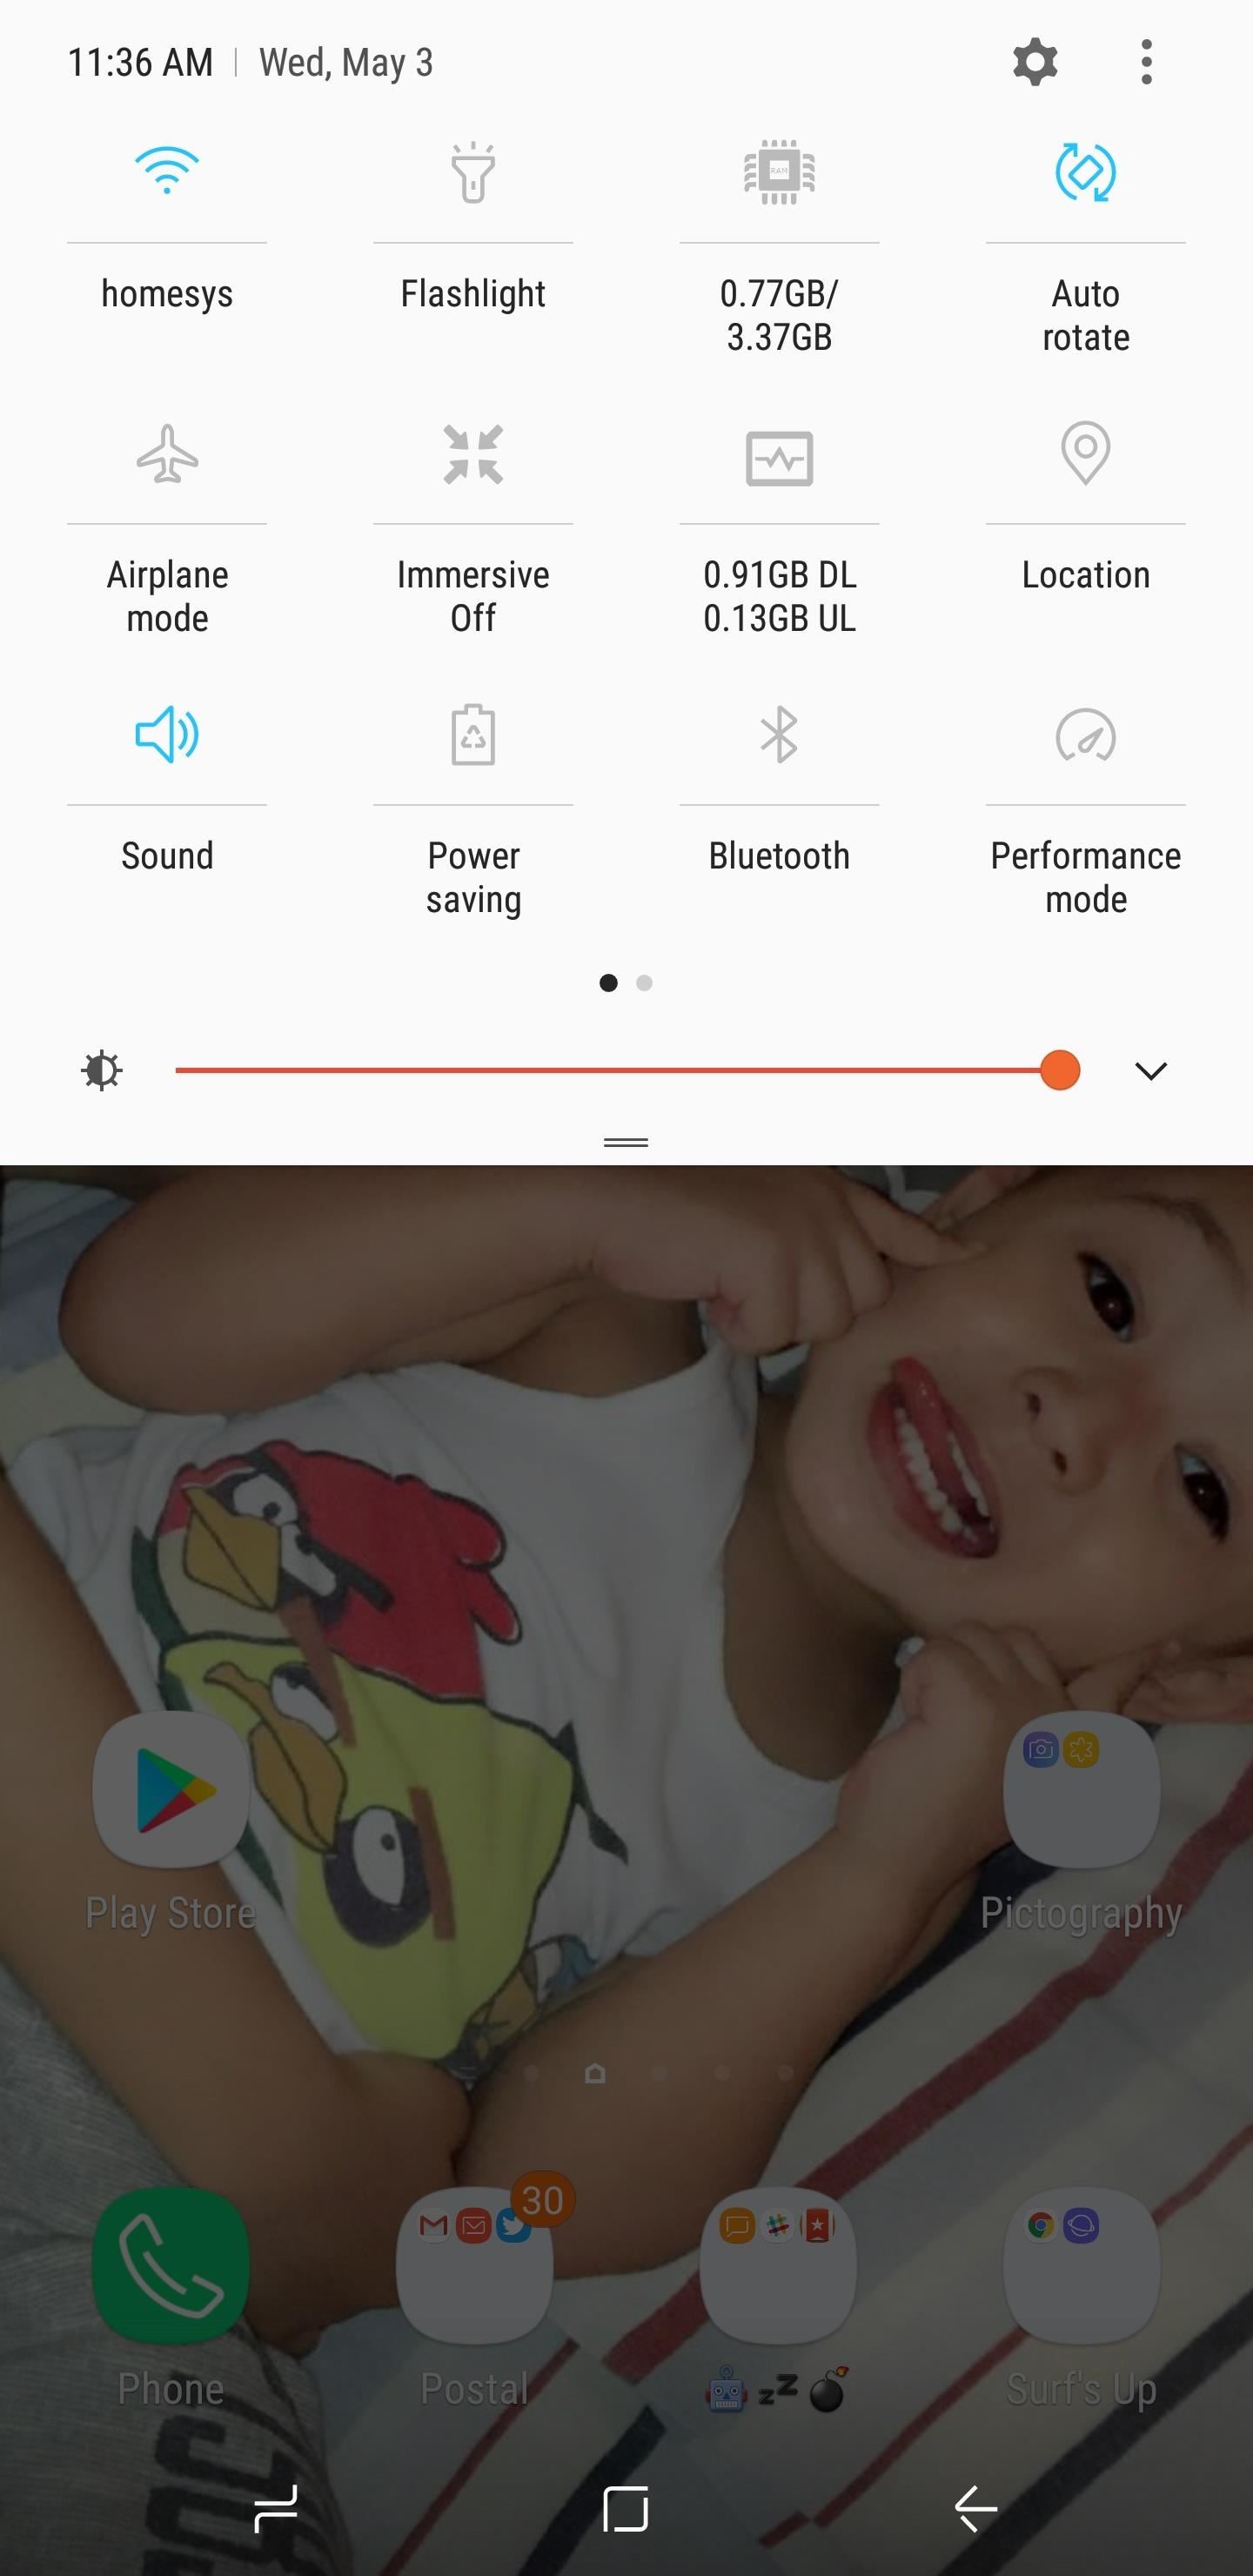
Step 5: Add Shortcuts to Quick SettingsYou're now free to add the customized tiles you've enabled in Shortcutter to the Quick Settings page of your Android. To do that, swipe down twice from the top of your screen to fully expand the Quick Settings menu. From there, tap the three-dot menu button (or the pencil-shaped icon to the left of the cog symbol on some devices) and choose "Button order." You'll now be presented with custom tiles to drag into your main settings menu, so pick the tiles you enabled, and drag and place them in the order you desire. RAM and Data Usage are our favorite tiles, as they give you the ability to quickly view this vital information with just a swipe. Which custom tiles would you recommend? As always, feel free to share your thoughts and leave a comment belowDon't Miss: Get an Immersive Mode Quick Settings Tile on Any Nougat Device — No Root NeededFollow Gadget Hacks on Facebook, Twitter, Google+, and YouTube Follow Android Hacks on Facebook, Twitter, and Pinterest Follow WonderHowTo on Facebook, Twitter, Pinterest, and Google+
Cover image and screenshots by Amboy Manalo/Gadget Hacks
Taser dear friends with hacked camera « Hacks, Mods
Have you ever wanted to change the status bar on your Android phone or tablet? Maybe you wanted to change the position of the clock, add a battery percentage, or just get a different look. Whatever your reason, there's a simple way to customize your status bar-and it doesn't even require root access.
Get Battery Percentage Indicator on Any Android Device
Does your broadband seem a bit sluggish? If so, there may just be a simple solution. You'll need: A computer connected to the internet. Follow these step-by-step instructions to find out how to speed up your internet connection
How to Speed Up your Internet Connection: 15 tips + tricks
Like what iMessage is to iOS, Google Hangouts is to Android—allowing users to share messages instantly, as if quickly wasn't good enough. With Google Hangouts, you can share locations and send maps, receive and send SMS, share animated GIFs, make video calls, and chat not only with your phone's contacts, but also your Google+ and Gmail buddies.
How to Theme Hangouts for Android with 23 Custom Colors
Android on a Stick, or how to install Android-x86 on a USB
linuxbsdos.com/2015/03/26/android-on-a-stick-or-how-to-install-android-x86-on-a-usb-stick/
Android on a Stick, or how to install Android-x86 on a USB stick March 26, 2015 5:53 pm The Android-x86 project provides ISO installation images of Android that can be installed on personal computers, which is cool, because that makes it possible to use the most popular operating system on the planet without buying an Android tablet or smartphone.
Chrome OS - Wikipedia
AndreiLux pointed out a new feature in the Samsung Galaxy S4 kernel called: CONFIG_SEC_RESTRICT_SETUID; This is a new addition to their kernel source code, and it's meant to prevent processes such as malware and exploits from changing a normal user to root user by using SETUID.
How to Get CyanogenMod's New Secured - Samsung Galaxy Note 2
After spending way too much time researching all over forums and blogs on how to customize Google docs forms and how I could use my own CSS styling. I set out to create my own form that fully embellishes all that I wanted to accomplish.
Style Your Google Docs with CSS - lifehacker.com
In this softModder tutorial, I'll be showing Maps Measure, which turns your Android device into a distance and area measurement tool using Google Maps. Grab the free app directly from Google Play.
How to Measure a Straight Line in Google Maps - nytimes.com
News: iOS 11.2 Released to the Masses with Bug Fixes, Apple Pay Cash & More New Features How To: Use Apple Pay with Face ID on Your iPhone X, X S, X S Max, or X R; News: Apple Just Released iOS 12.3 Developer Beta 2 Today, Includes Date & Time Features & Updates to Wallet Transactions
All the New Apple TV Features in iOS 12.3 for iPhone « iOS
How to Make a Clothespin Pocket Pistol (AKA Mini Matchstick Gun) Mini Matchstick Gun - the Clothespin Pocket Pistol: In this project we're taking boring old clothespins, and up-cycling them into powerful matchstick & toothpick shooters, that will stick into apples, and lob firey darts over 20 feet.
HOW TO MAKE A MINI MATCHSTICK GUN - THE CLOTHESPIN - YouTube
To connect your iPhone, iPad or iPod to your home stereo you just need a 3.5mm to RCA cable like this cable here. The RCA cable plugs into the rear of your stereo and the 3.5mm plugs into your iPhone headphone jack.
Hello! If you would like to know how to connect your Wii Remote to your PC, you have come to the right place. By the end of this guide, you will be able to: Use your Wii Remote as a game controller. Use your Wii Remote as a mouse Create your own custom keybindings for your Wii Remote. (As long as it
How to Play PC Games on your iPhone using Moonlight
How To: Enable LED Flash Alerts for Calls & Notifications on Galaxy Devices How To: Turn Off the Low Battery Warning Sound & Notification in Android 9.0 Pie How To: Customize LED Alerts for Specific Notifications on Your Samsung Galaxy Note 2 (No Root Required)
Samsung Galaxy Flashing Light Notification [updates in
Google's new Night Sight low-light camera mode takes amazing photos in super low light. Here's how it compares with other top phones from Apple, LG, OnePlus, and Samsung.
Best NIght Vision RfleScopes | Night Vision w/Ultra HD Sensor
AD
If you'd like to shuffle all songs in your music library, start by heading to the "Songs" menu in the Music app's Library tab. From here, select any song to start playback, then tap the mini-player towards the bottom of the screen to expand the "Now Playing" view.
music.app - How to shuffle all songs in iOS 8.4 music app
0 comments:
Post a Comment