How To: Test Your Samsung Phone by Using Secret Code *#0*#
Besides obvious features like a touchscreen and biometric sensors, the modern smartphone comes with an array of state-of-the-art hardware in the form of various sensors that help your device sense the environment around it. And if you have a Samsung handset, chances are, you have a handy feature built in that enables you to check if these sensors are functioning 100 percent.Unbeknownst to a lot of Samsung fans, most Galaxy phones have a secret diagnostic mode built in which can be accessed simply by inputting a little-known code. Best of all, this feature is extremely easy to access and is a handy way of testing out a new or used phone to ensure it's in perfect running order before you commit to buying it.Don't Miss: Gamify Diagnostics on Your Android Phone with This Cool Little App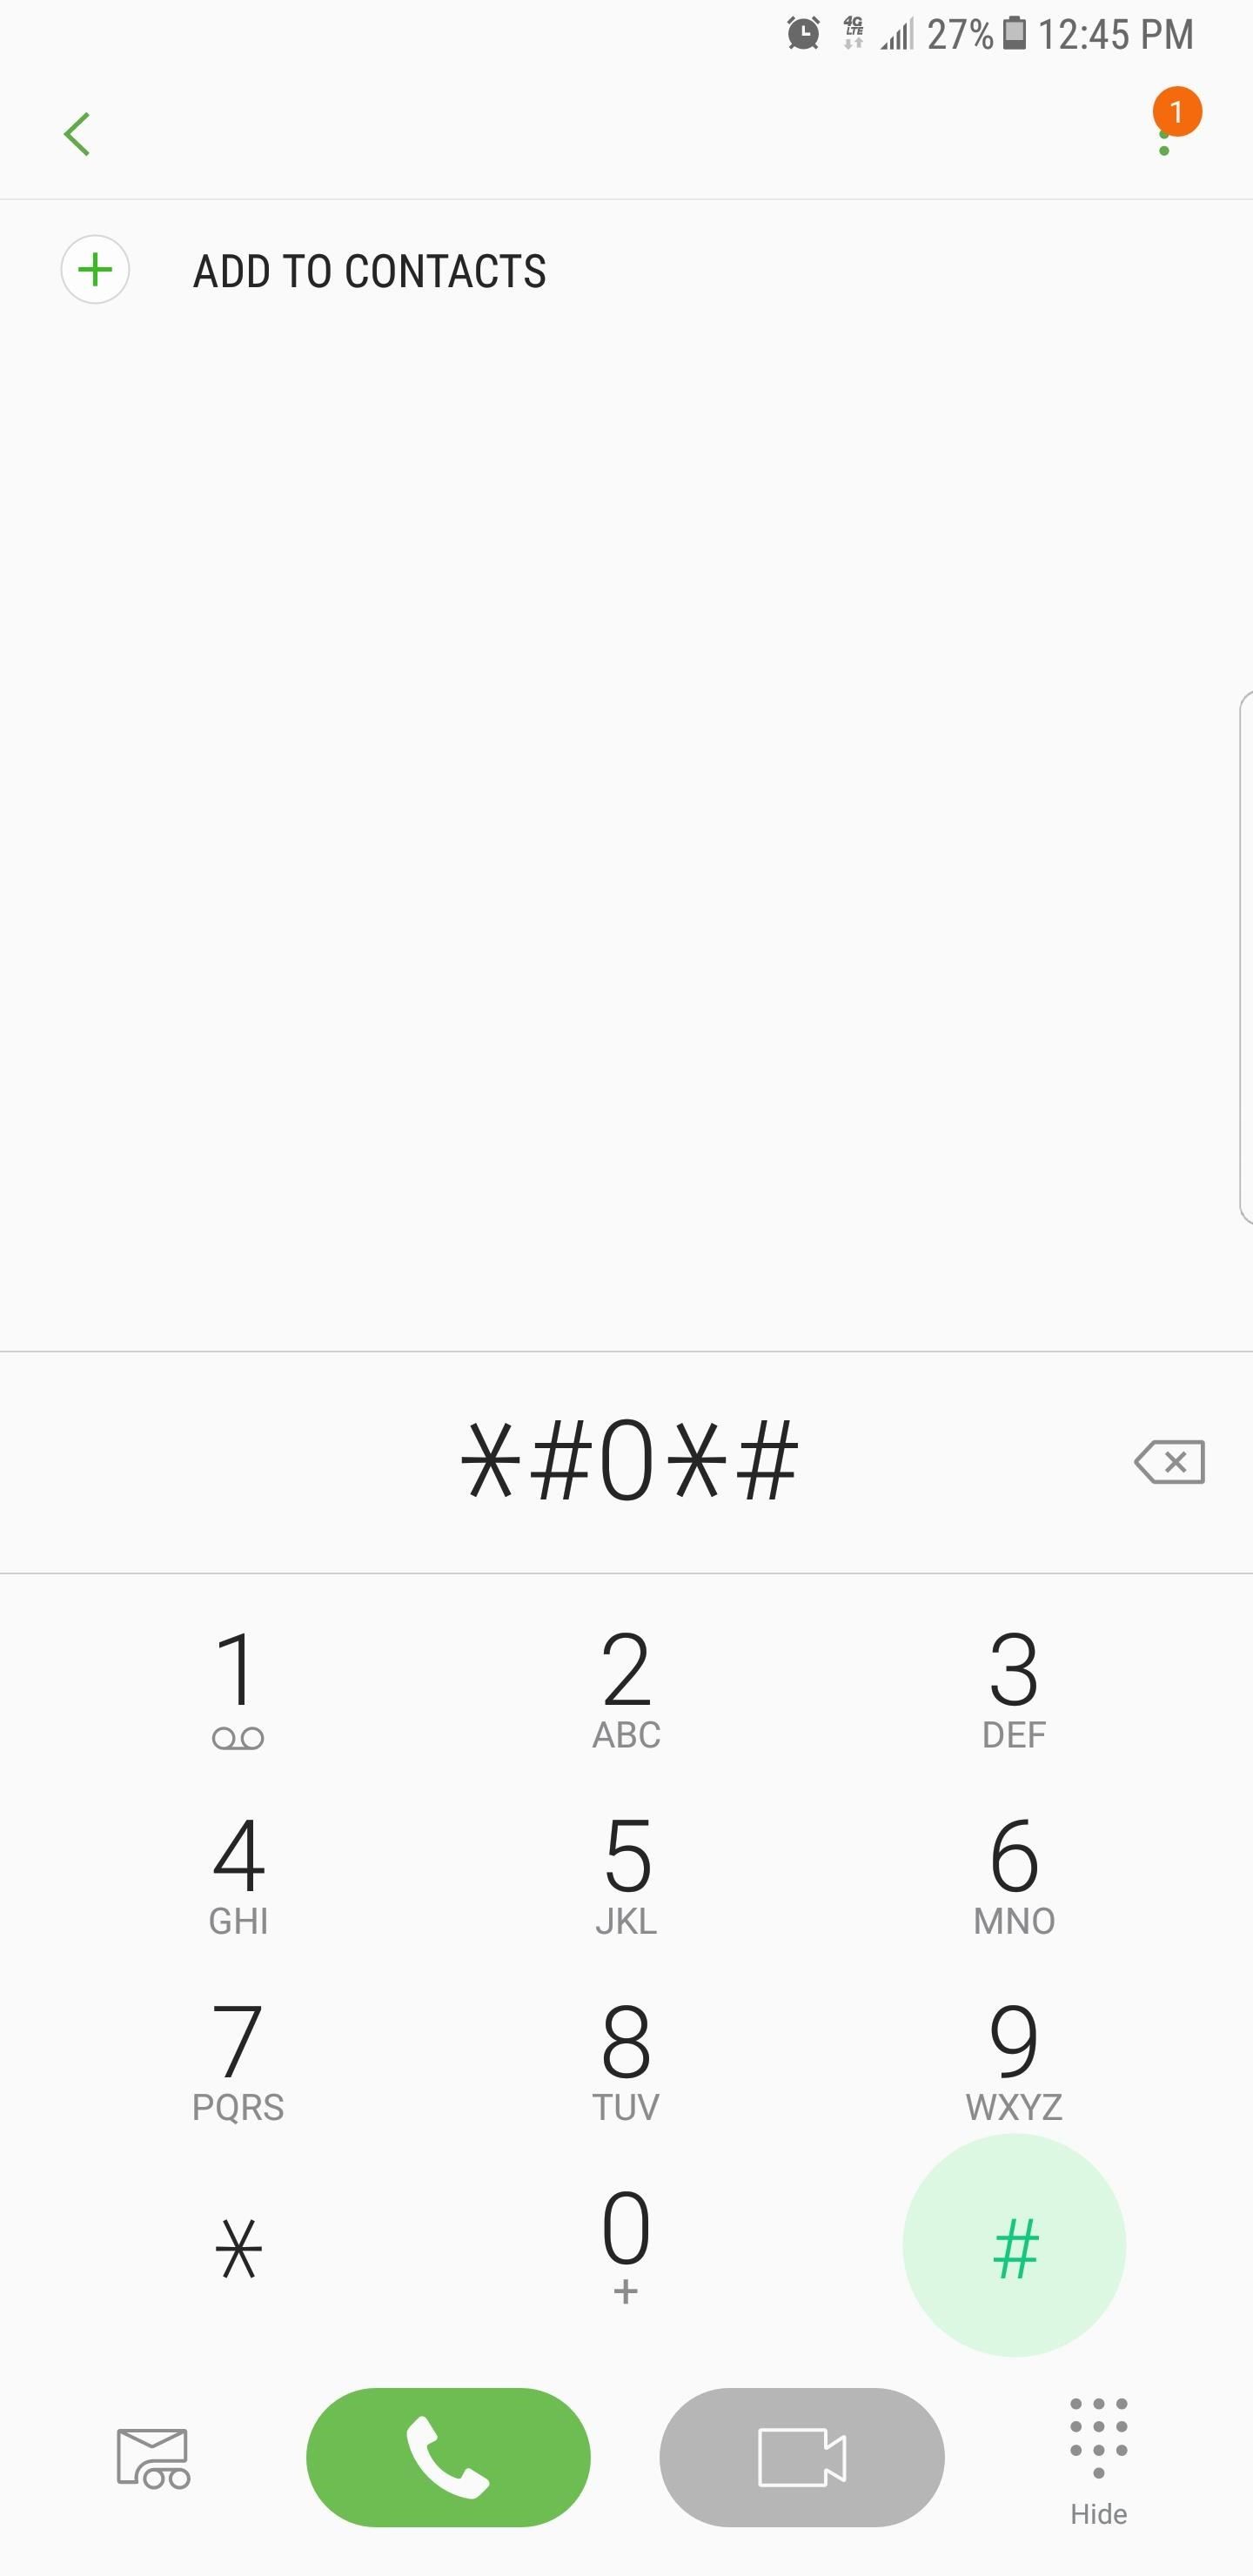
Accessing the Secret Diagnostic MenuBefore we begin, it's important to note that this feature may not be available on your device. Certain carriers, most notably Verizon and Sprint, have been known to block the code-based diagnostic mode on their Samsung smartphones and tablets, though newer phones from Sprint like the Galaxy S6 seem to have this functionality restored.To get the ball rolling, simply open your Samsung's phone app. From there, enter *#0*# using the dial pad, and the phone will immediately go into its secret diagnostic mode. Note that the process is automatic, so there's no need to tap on the green call button to enter the command. So if you enter the code and nothing happens, the feature is disabled on your device. Below are the following tests you can perform on your Samsung handset once you've input the code and entered HwModuleTest mode. Please note that some may be missing screenshots due to security reasons or the nature of the tests.
Red, Green & Blue ScreensSelecting any of these three tests checks for your handset's red, green, and blue color spectrums, and will brightly show the corresponding colors when selected. To go back to the main diagnostic page, simply tap on the screen to exit.
Receiver & VibrationTo check if your phone's receiver is working properly, tap on the "Receiver" button to commence testing. Doing so should take you to a white screen, accompanied by a clearly audible dial tone. Once you're satisfied, simply tap on the back button twice to go back to the main test page."Vibration" tests out your phone's vibration motor. Your screen will go black once you tap on the "Vibration" button, accompanied by a constant vibration. Tap on the screen once to exit this test and go back to the main test screen.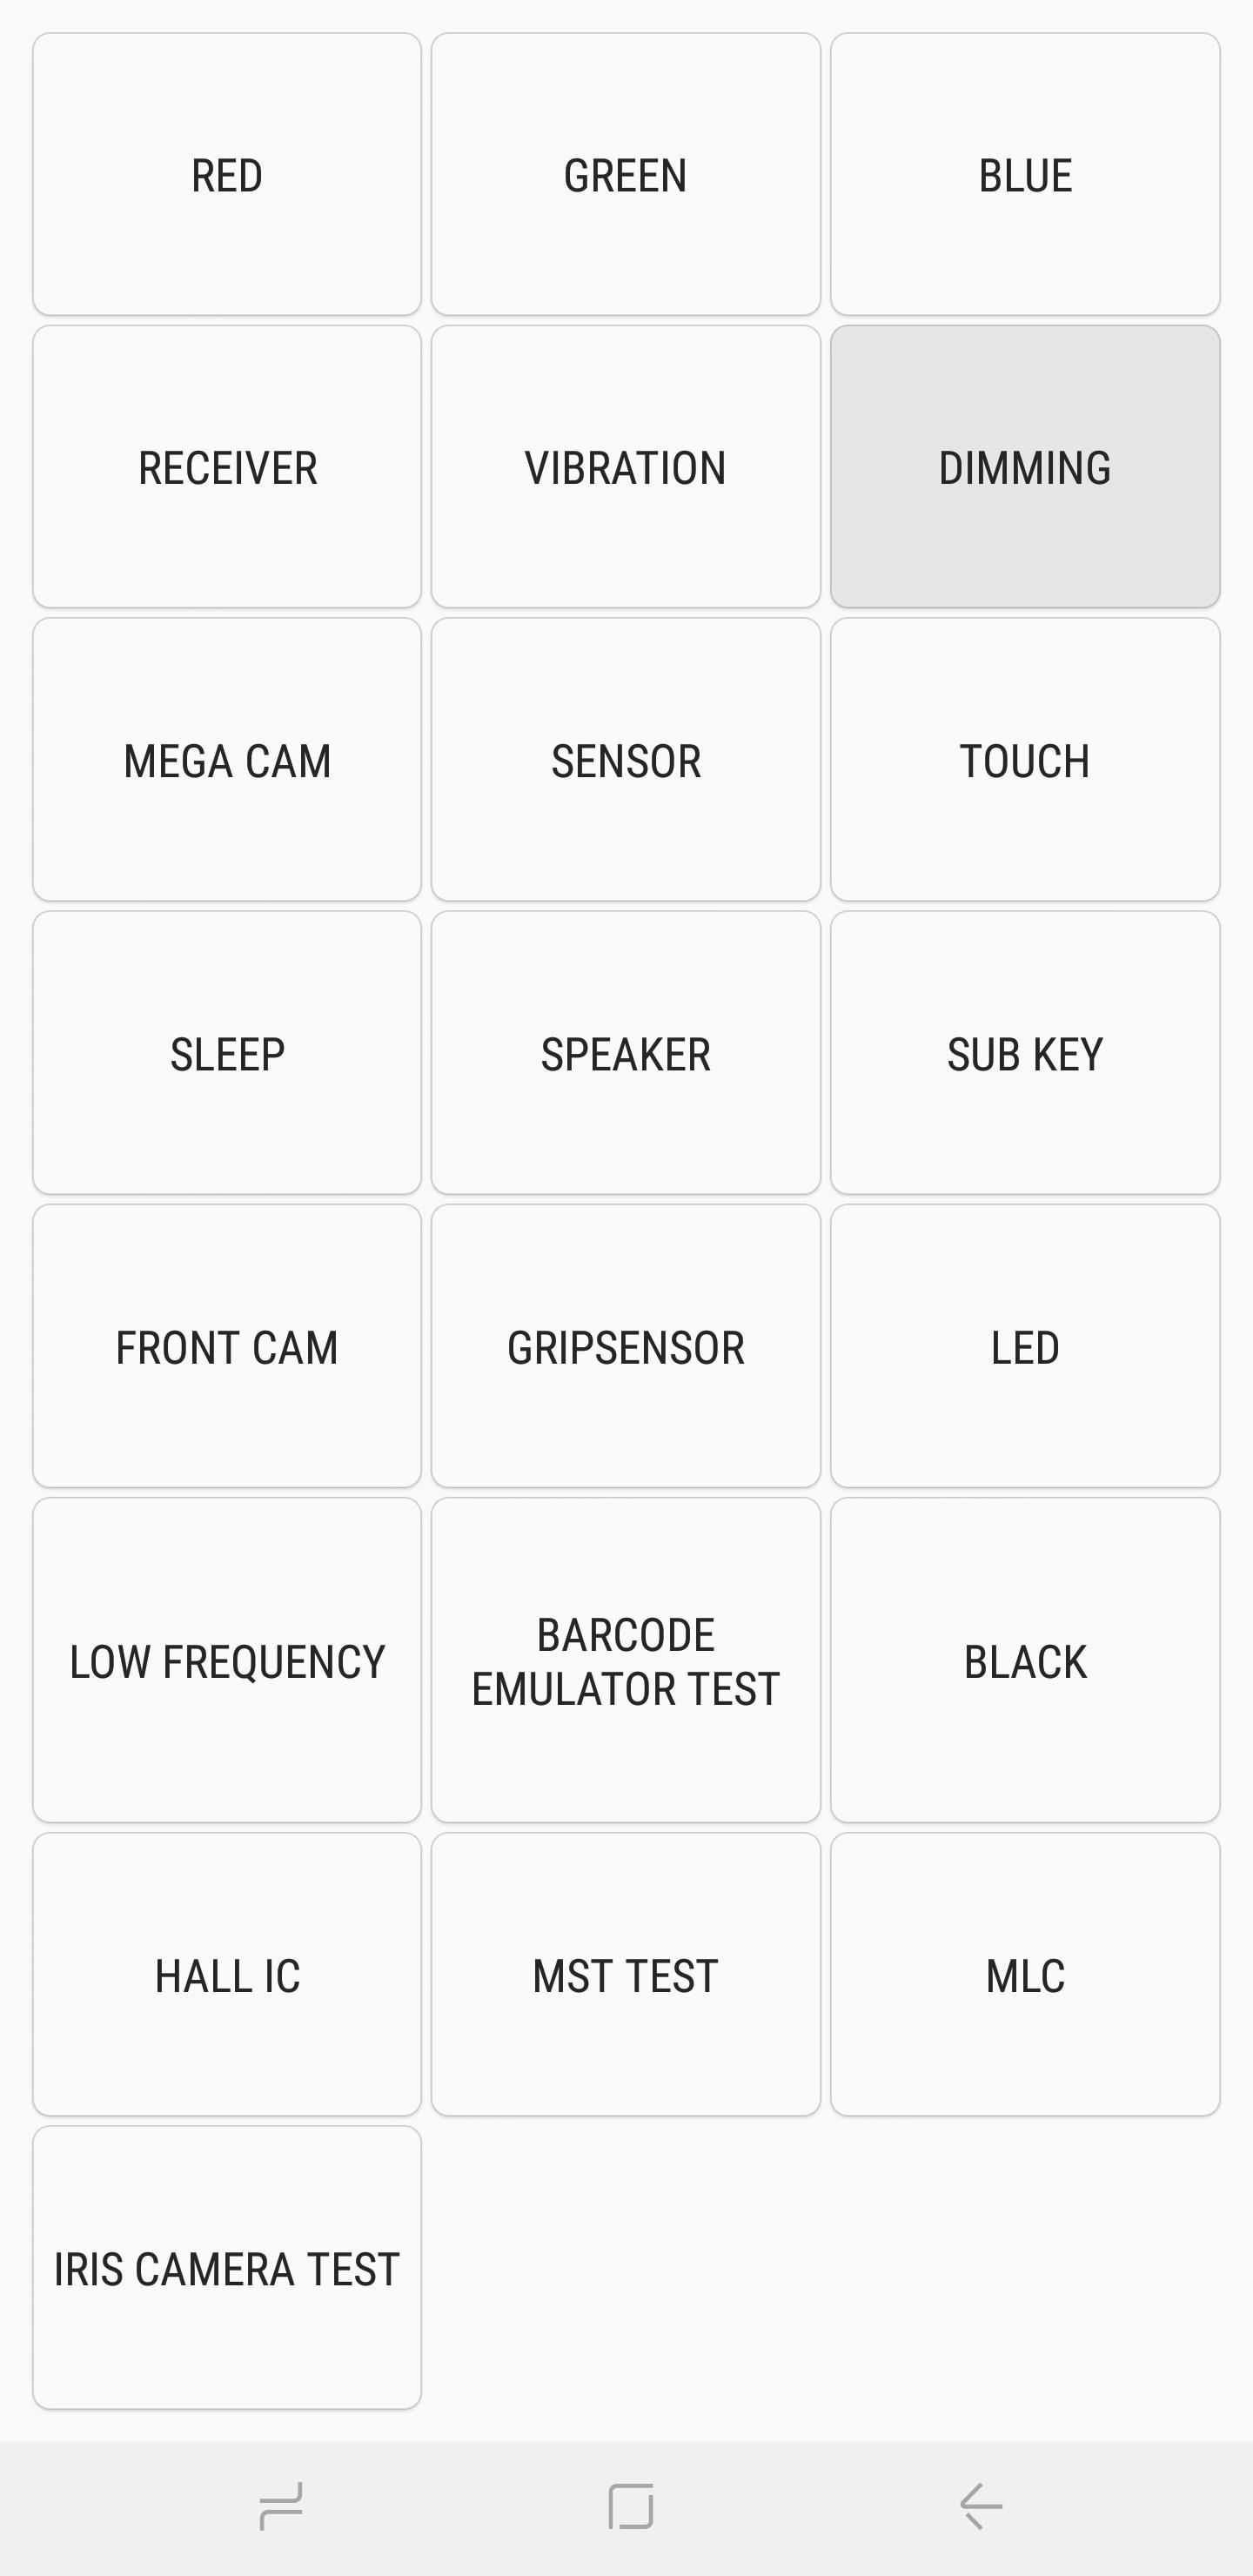
DimmingTapping on "Dimming" will bring you to a red, green, and blue screen. The screen will then alternate between dimming and brightening whenever you tap the screen. To exit back to the main test page, press the volume up button.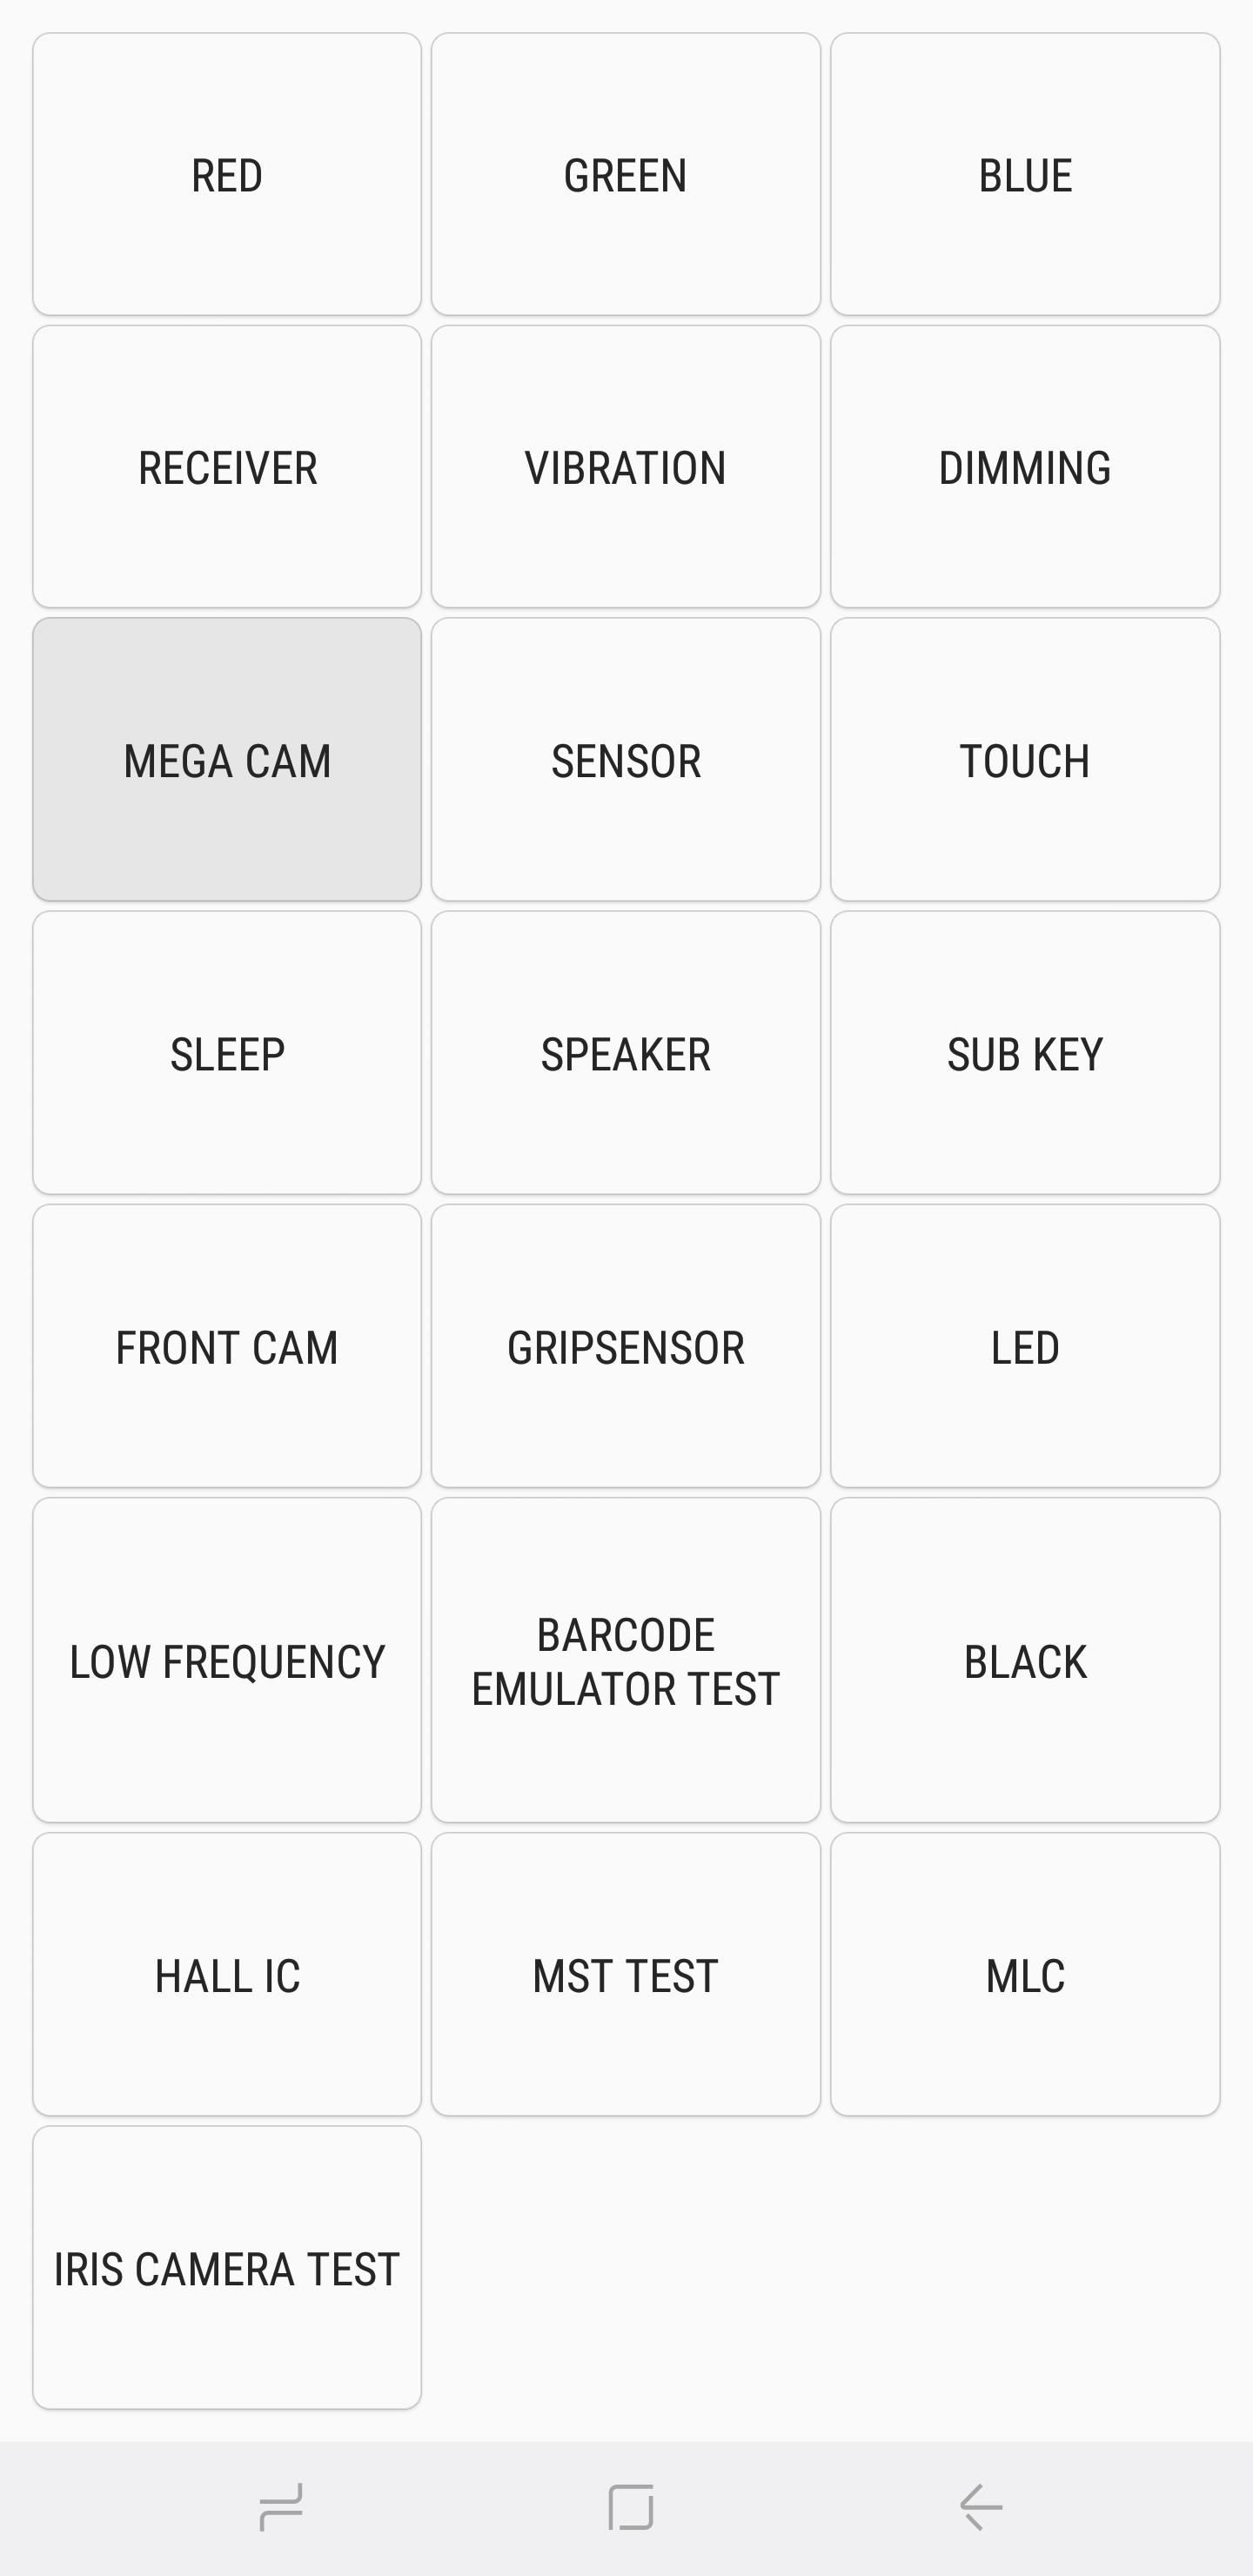
Mega CamTap on "Mega Cam" to test out your main camera. Use the volume buttons to zoom in and out, then tap on the camera button on the bottom of the screen to snap a photo. Please note that flash is on by default, and your test photo will also be saved in your gallery. Once you're done testing the camera, tap on the back button to exit out to the main diagnostic screen.
SensorTapping on the "Sensor" button will yield a test page for a host of sensors — namely the accelerometer, proximity sensor, barometer, light sensor, gyroscope, magnetic sensor, HRM, and fingerprint scanner. I'll go over all eight of these submenus in separate sections below.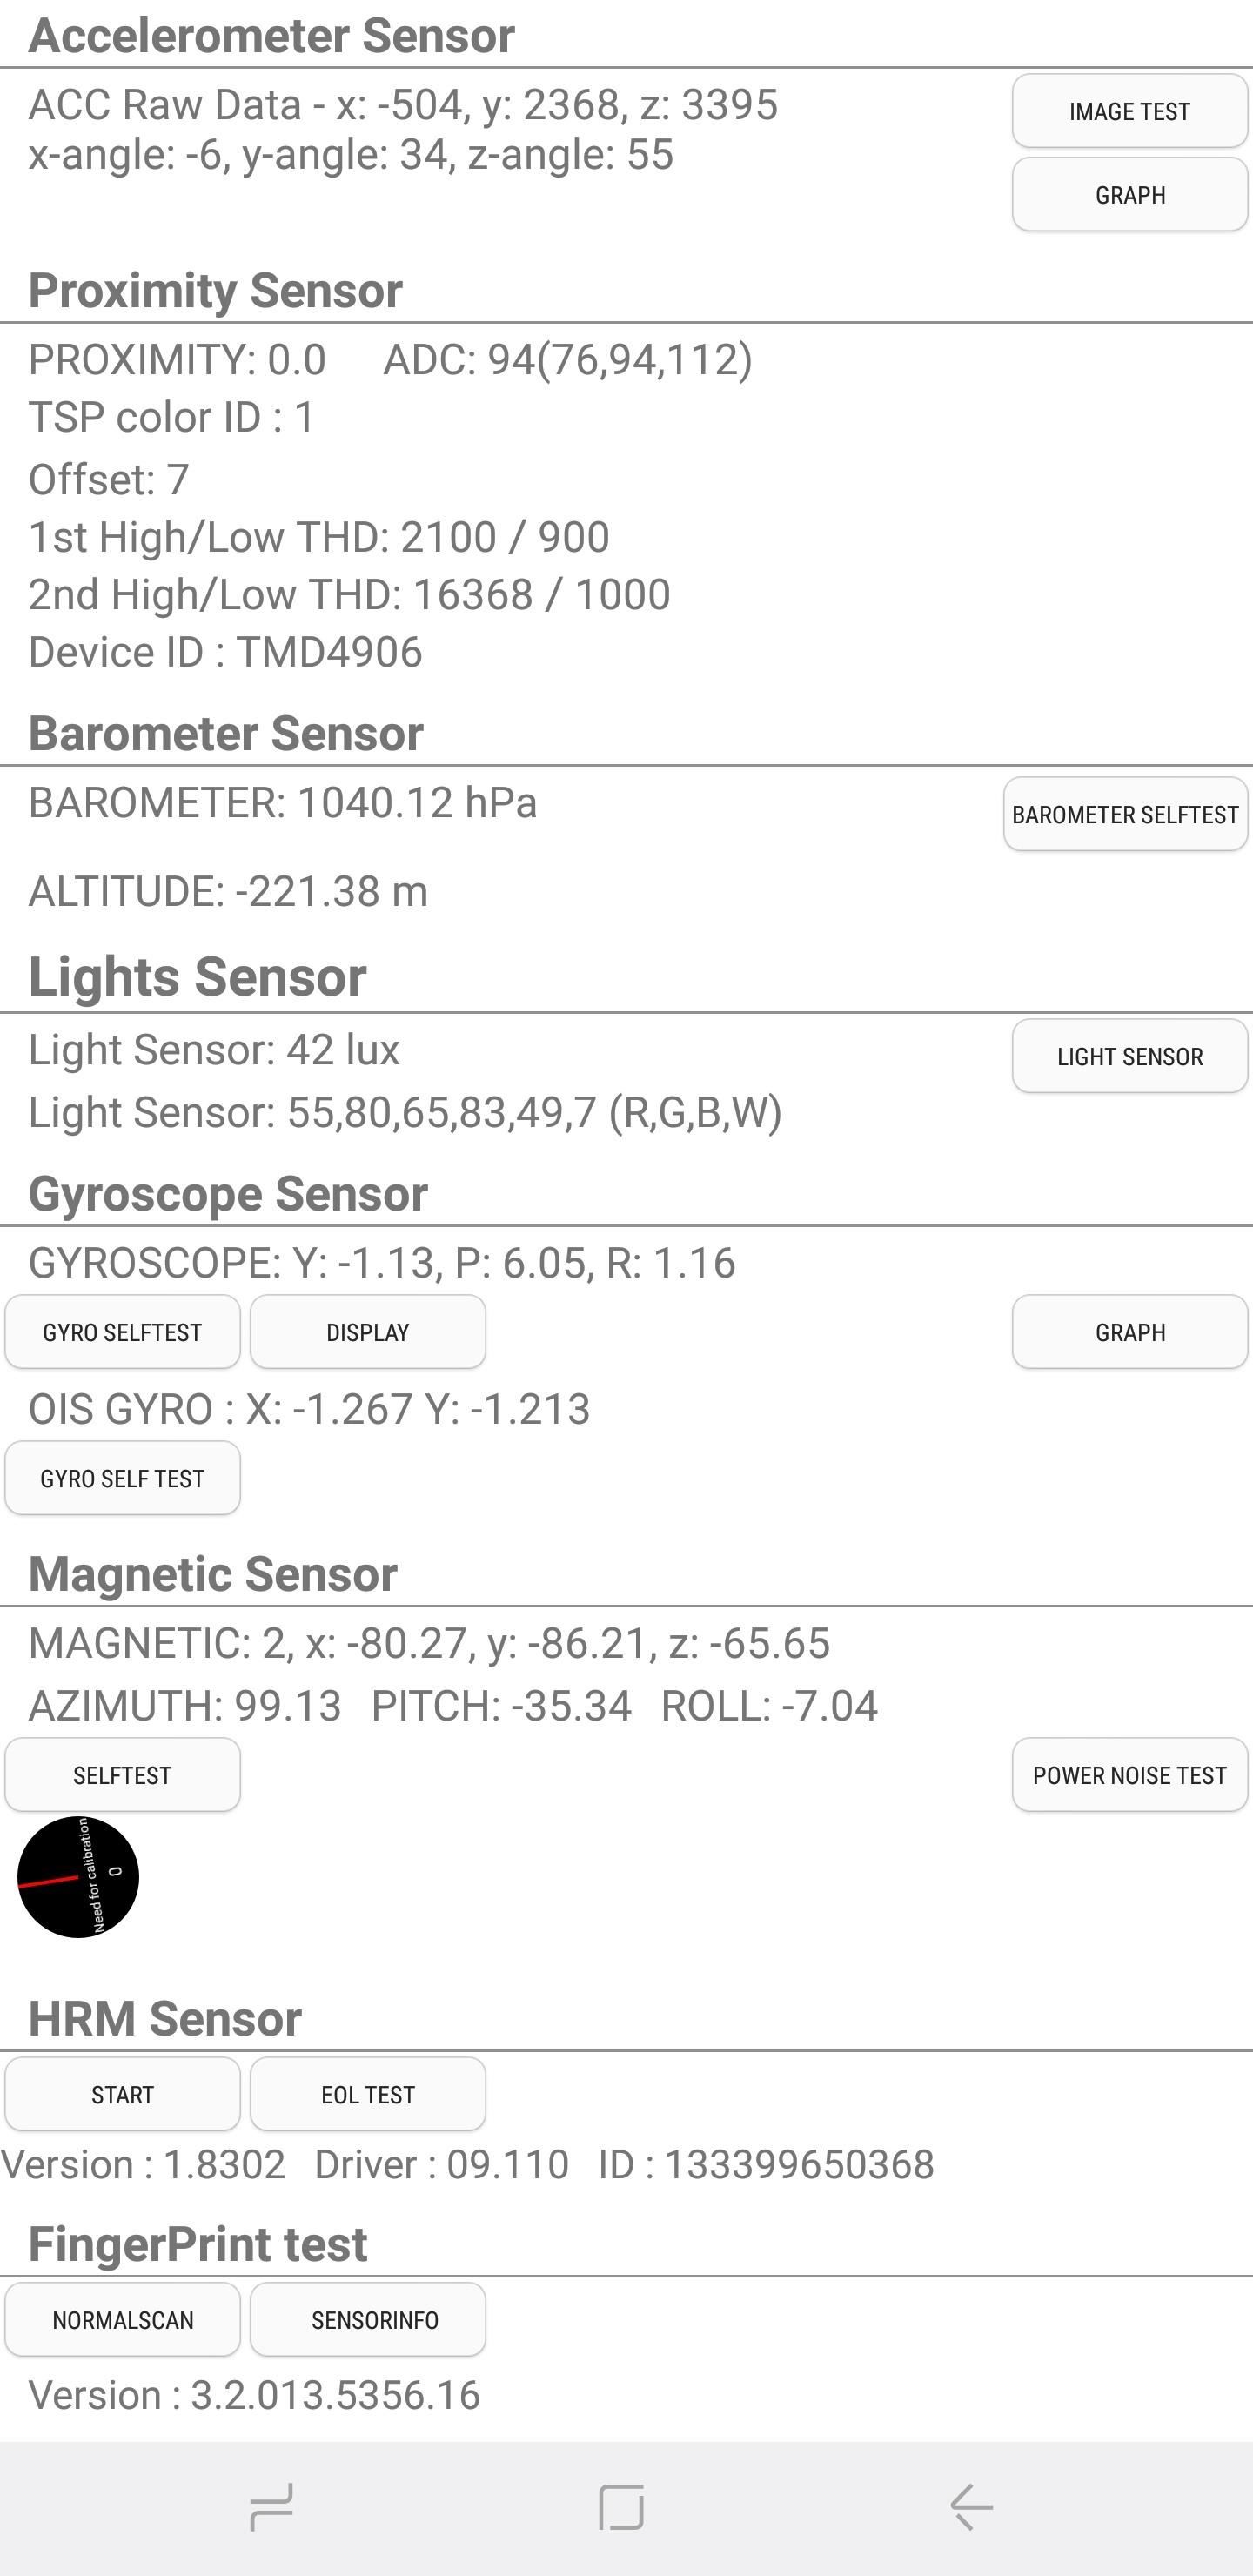
1. AccelerometerAccelerometers are vital sensors that are used to detect the orientation of the phone, primarily measuring linear acceleration of movement. To check for its functionality, tap on either "Image Test" to check for landscape-to-portrait transitions or "Graph" to measure how well the sensor detects movement by shaking your device up and down.
2. Proximity SensorThis tests your device's proximity sensor, which is responsible for turning your screen off whenever your phone is against your face in a phone call to prevent accidental touches. To test for this feature, simply cover the top of your phone with your hand. The screen should now turn green if the proximity sensor works, so uncover the screen to turn the screen white and proceed to the next test.
3. BarometerThis sensor is primarily responsible for tracking altitude, and it aids in giving more accurate GPS readings. The test for this function is straightforward — simply tap on "Barometer Selftest" to initiate an automated test that'll instantly let you know if it works or not.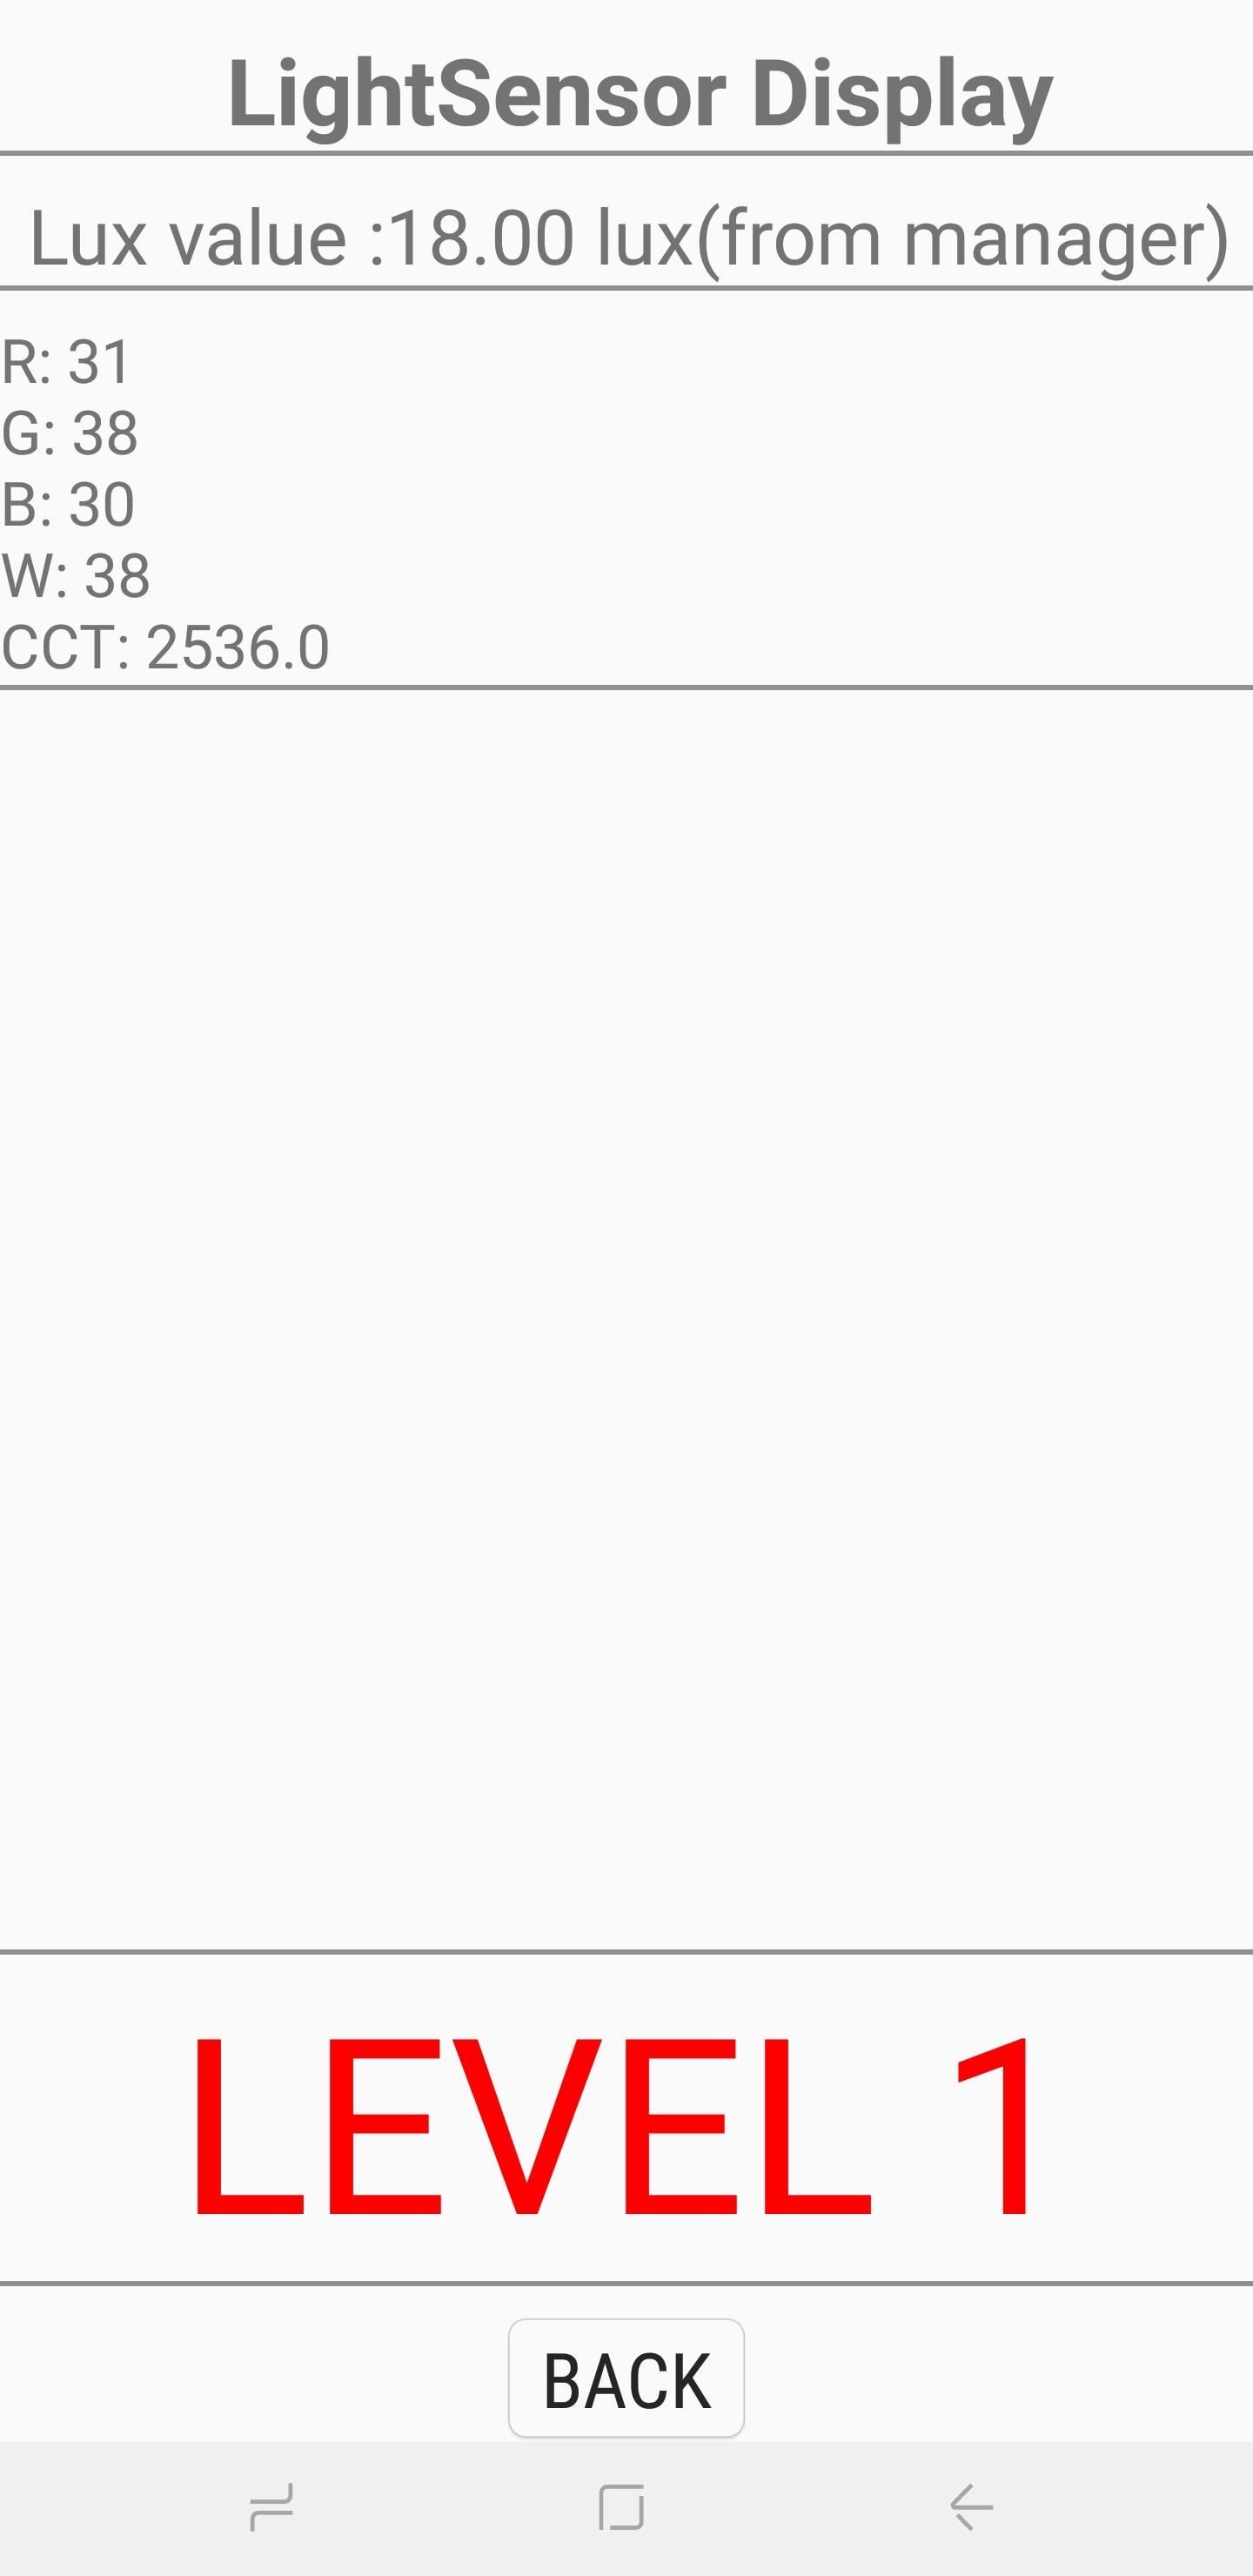
4. Light SensorAs its name suggests, this sensor is in charge of detecting ambient light. Tap on "Light Sensor" to initiate the test, then expose your phone to light of varying brightness. Three levels should register in turn, starting from "Level 1" for dim lighting all the way up to "Level 3" for extremely bright.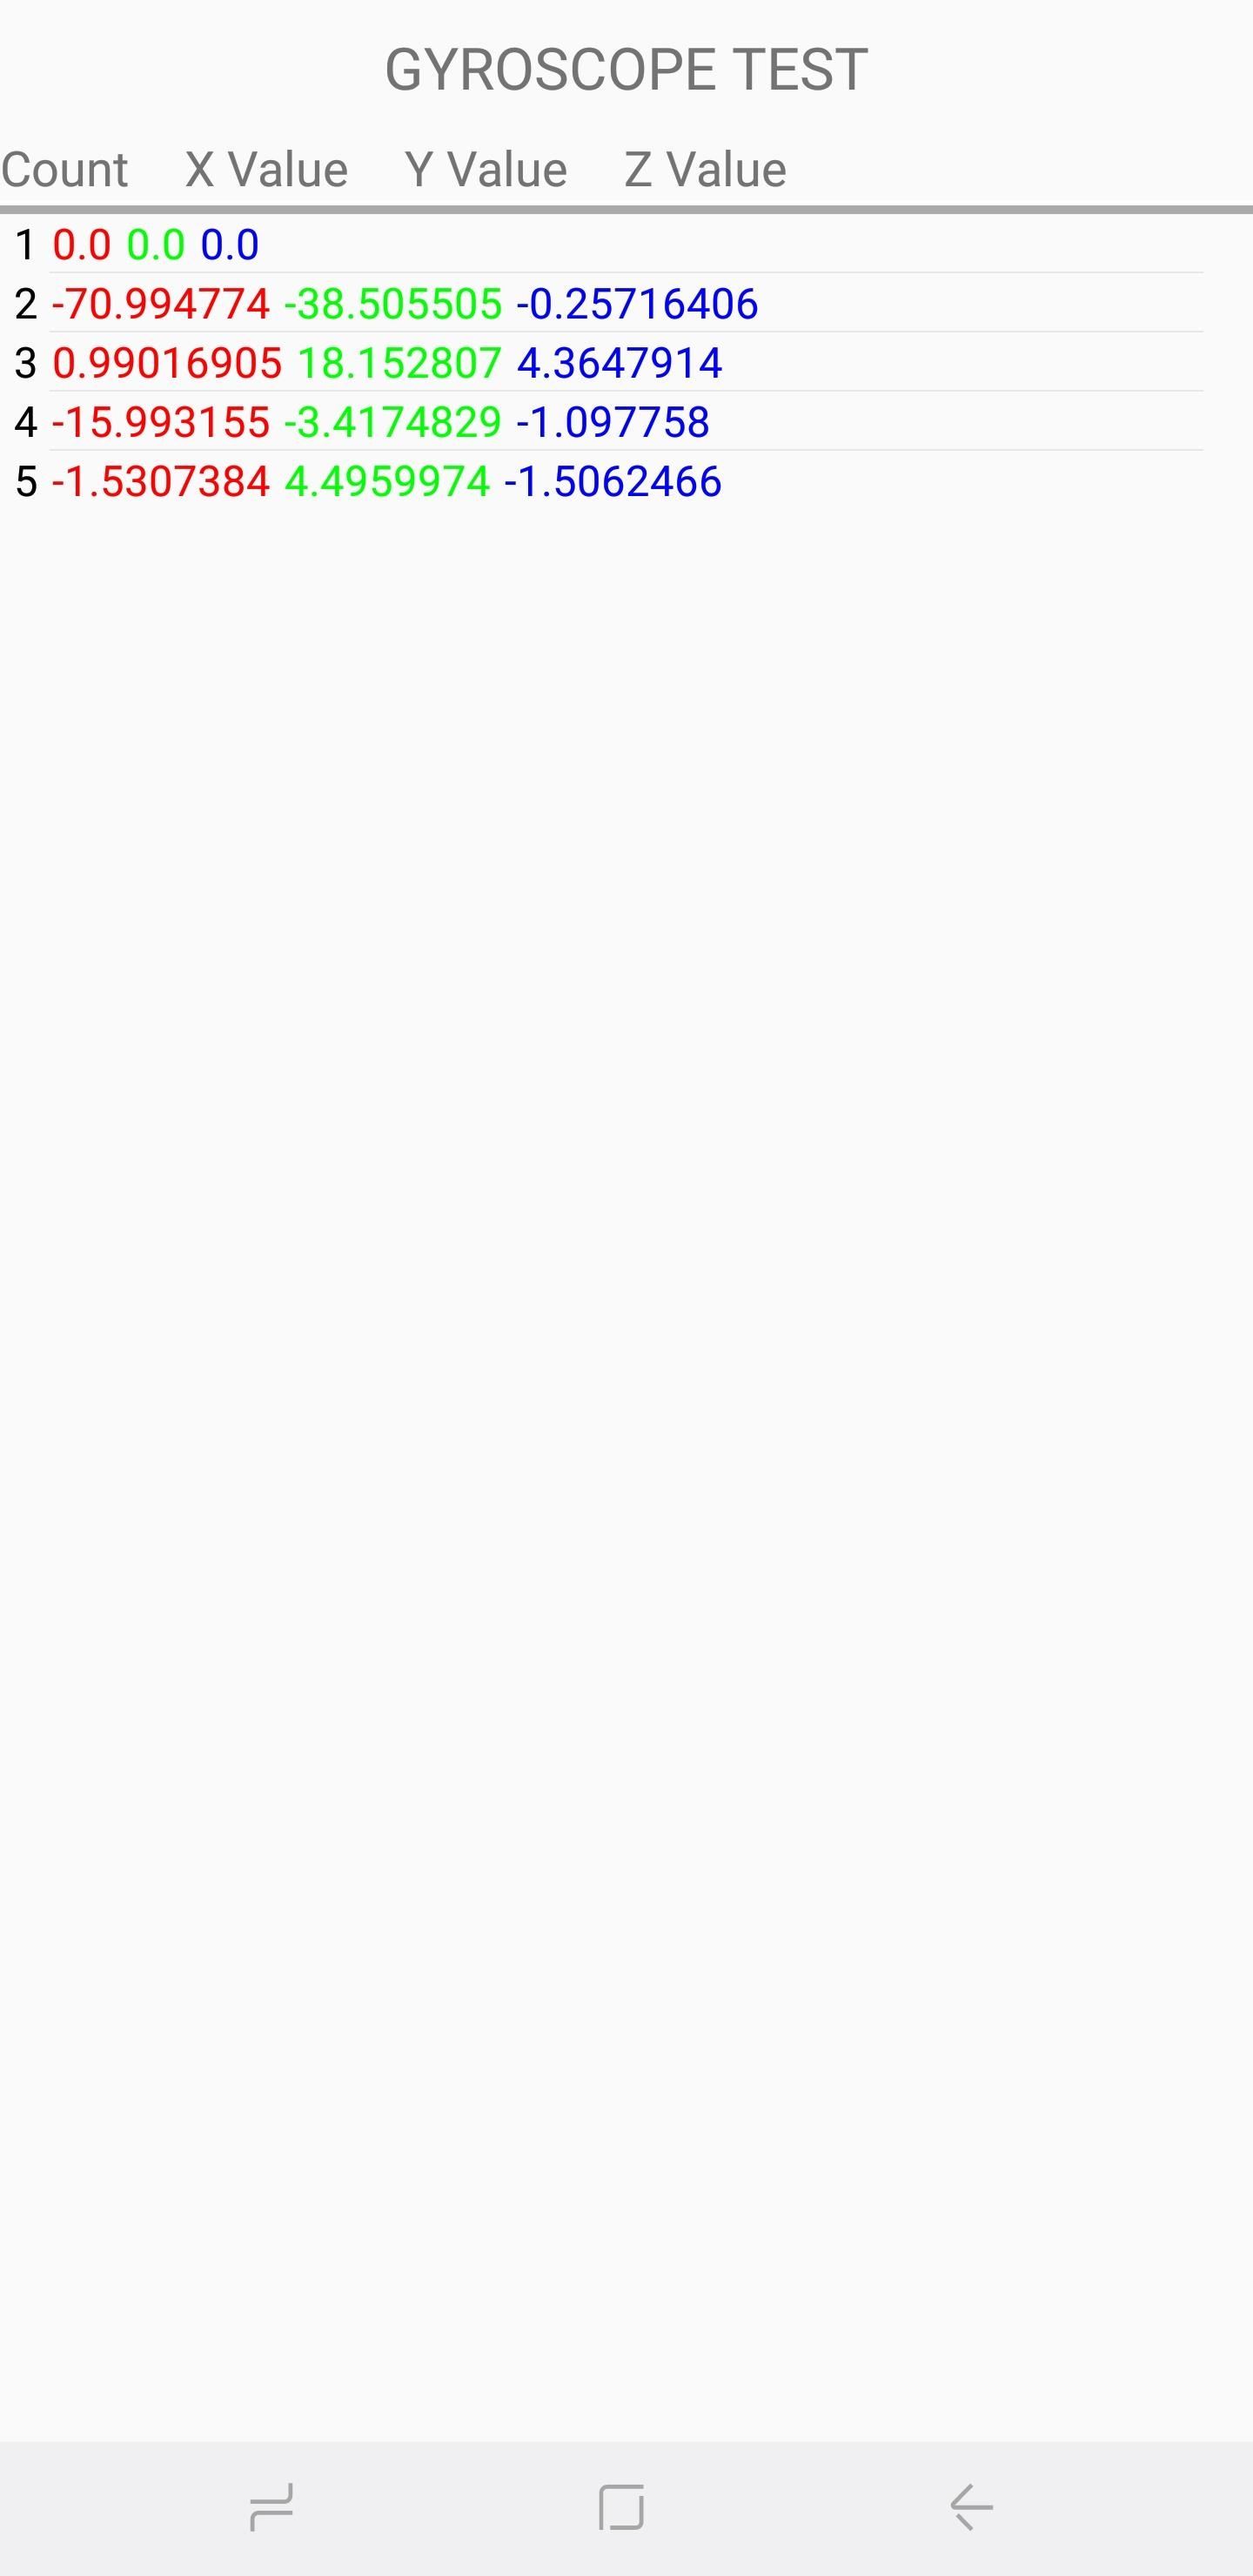
5. GyroscopeThe gyroscope measures your device's rotation and works alongside the accelerometer to paint a complete picture of general movement. There are several ways to test your handset's gyroscope — you can manually perform a test by tapping on either "Display" or "Graph," or you can rotate your phone around and read the corresponding results in either numbers or through a linear graph. Alternatively, you can opt to test your device's gyroscope functionality automatically by selecting "Gyro Selftest" for both the x and y axis.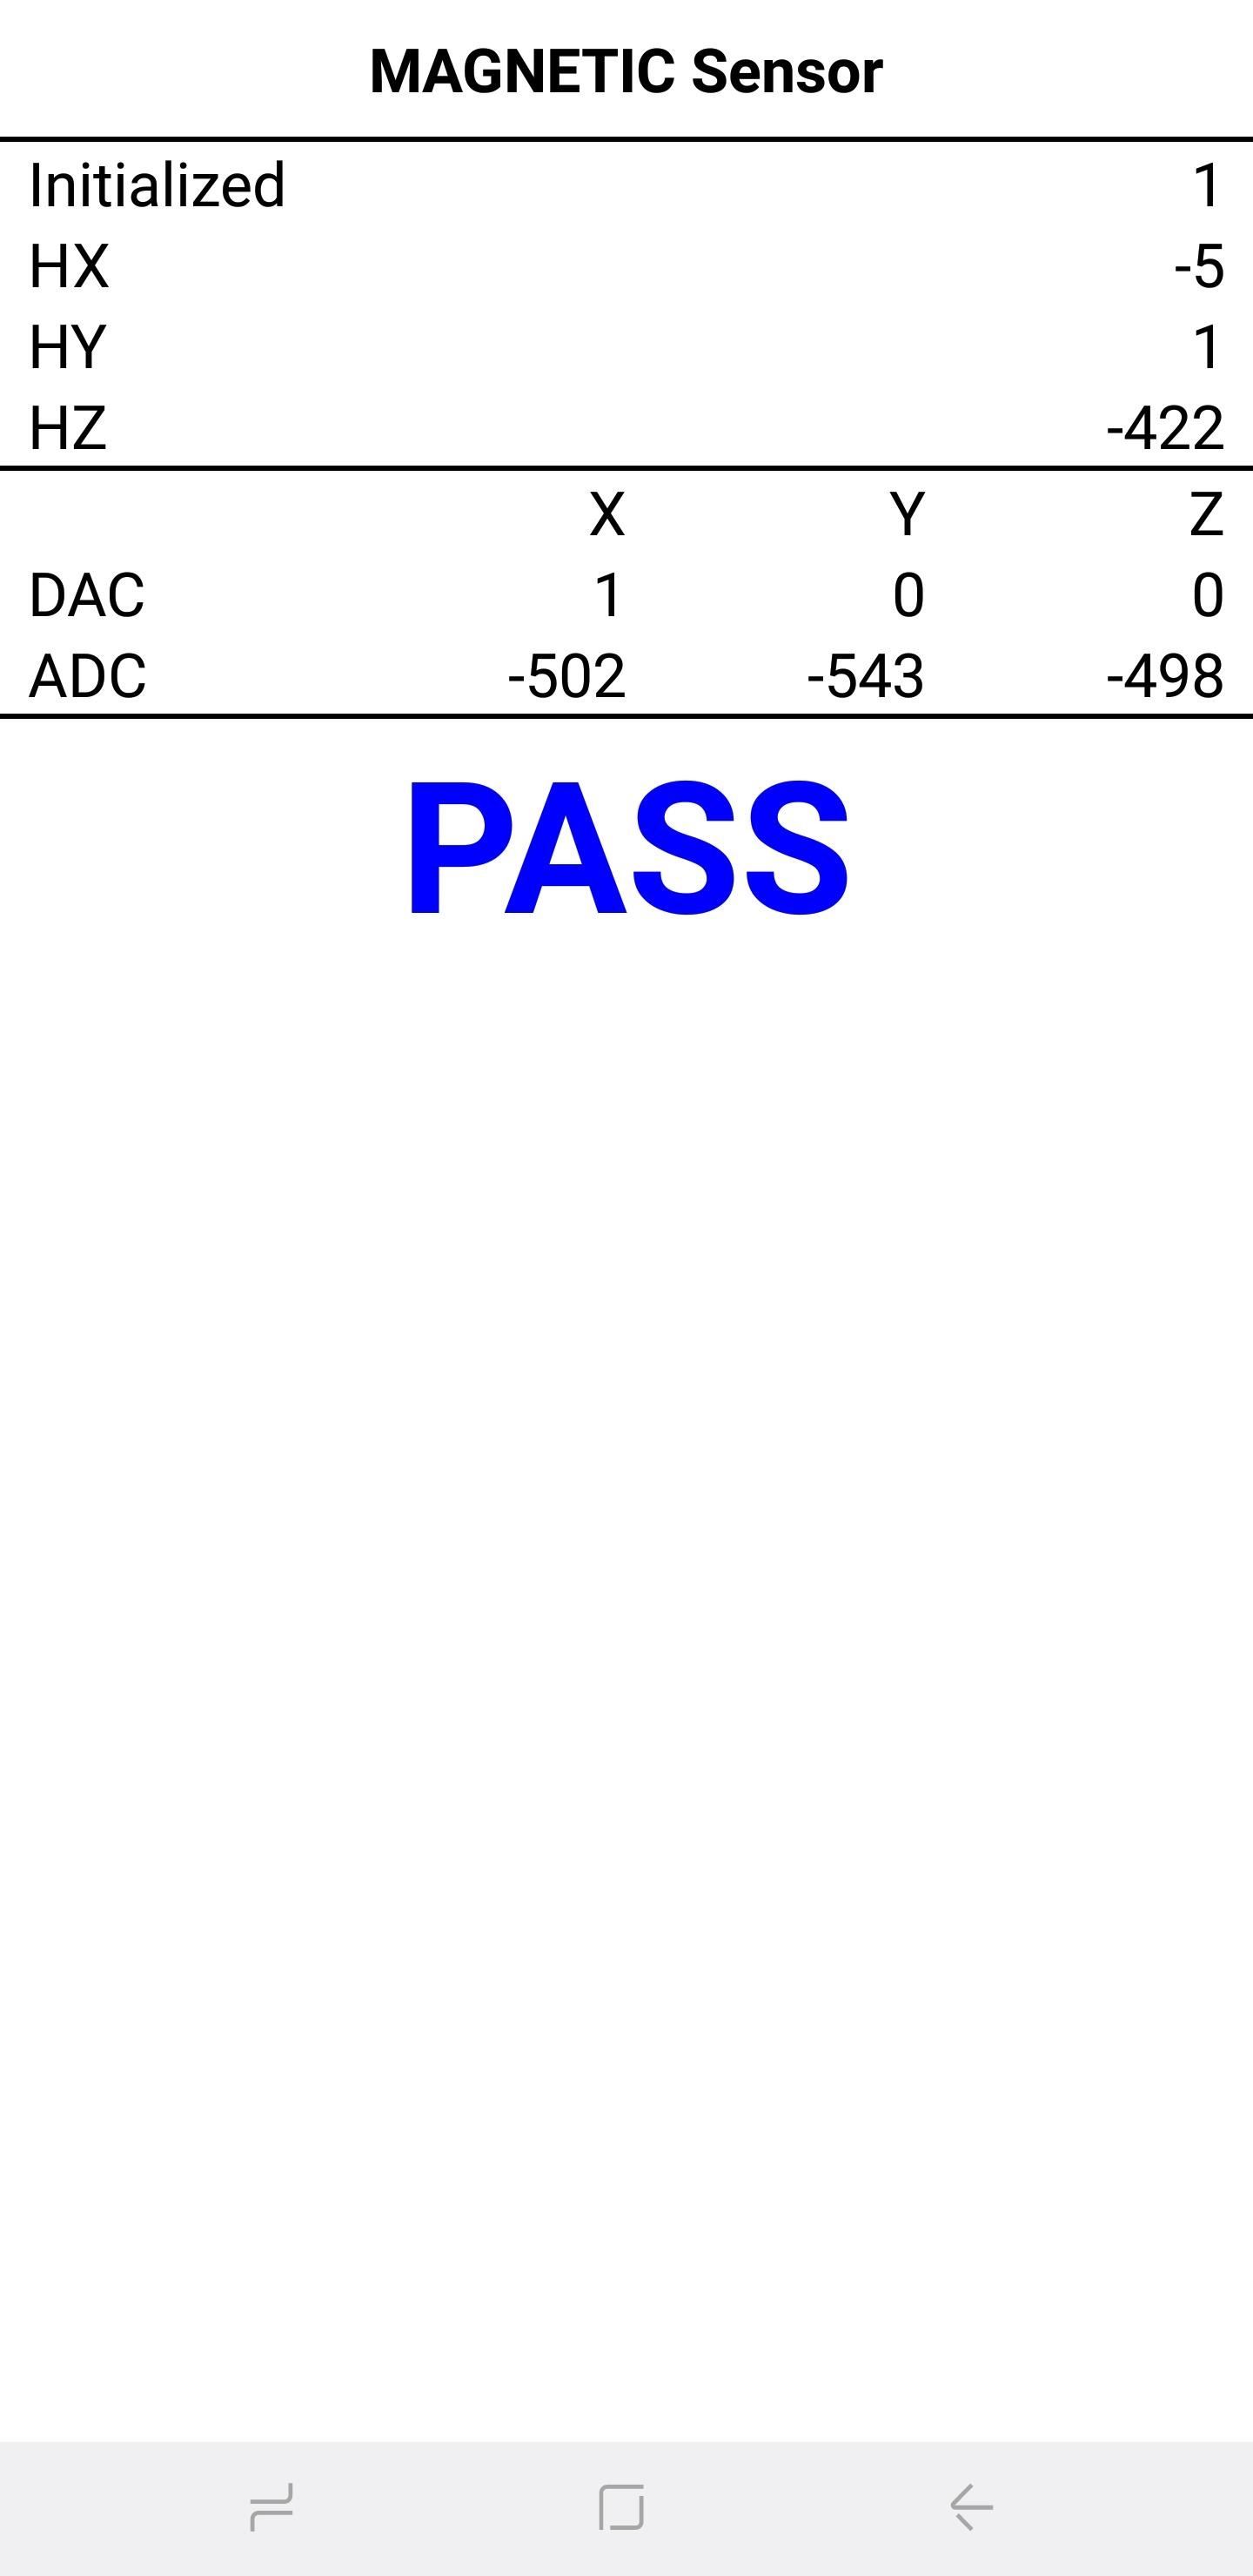
6. Magnetic SensorThis tests for the functionality of your device's magnetic sensor. Tapping on "Selftest" will initiate an automatic test to see if your device passes or fails. If you want to test manually, tap on "Power Noise Test," then run a magnet around your phone. On the S8, for example, the magnetic sensor is located along the top-left corner of the phone, as evidenced by the magnetic spikes on the graph when a magnet is close to that area.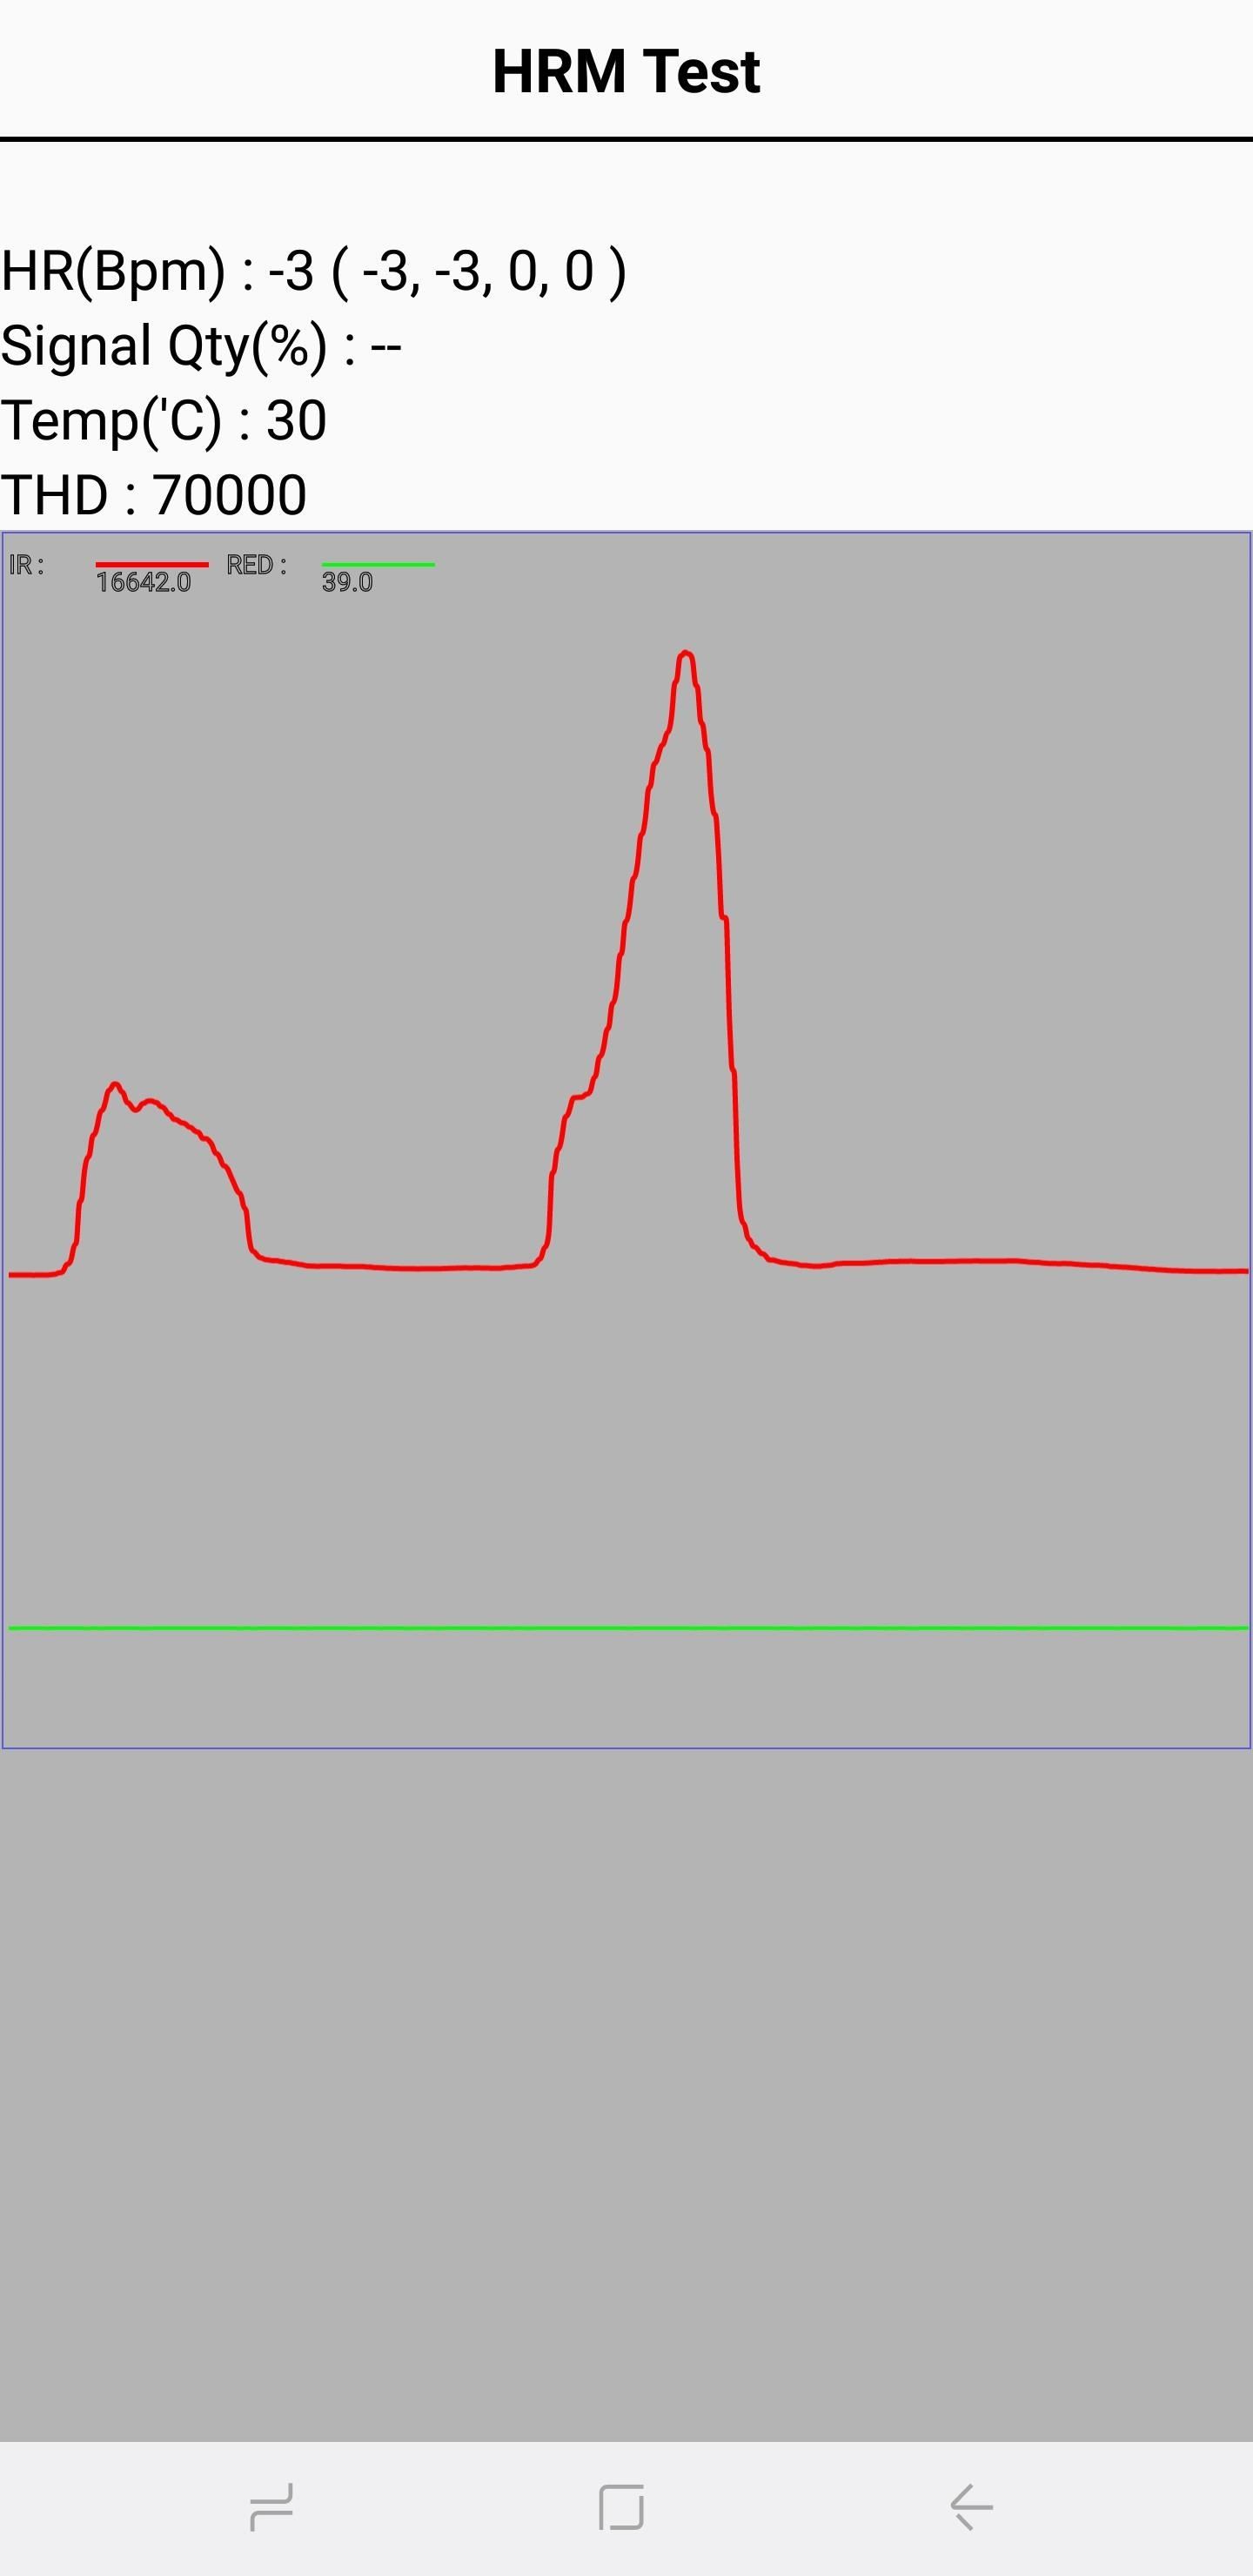
7. HRMThis tests out your smartphone's heart rate monitor and can be performed in two ways. Tapping on the "Start" button within the "HRM" tab will take you to the "HRM Test" page, and from there you can test your handset's heart rate monitor by placing your finger on the sensor. If you want to run the "HRM EOL" test, you'll need to place your phone on a flat service and keep it completely still, otherwise, it will register multiple failures.
8. Fingerprint SensorThis tests out your fingerprint scanner. Tap on "Normal Scan" to commence testing, which will take place automatically to check if all components are functioning properly. Tapping on "Sensor Information" will reveal details like firmware version that you can look through.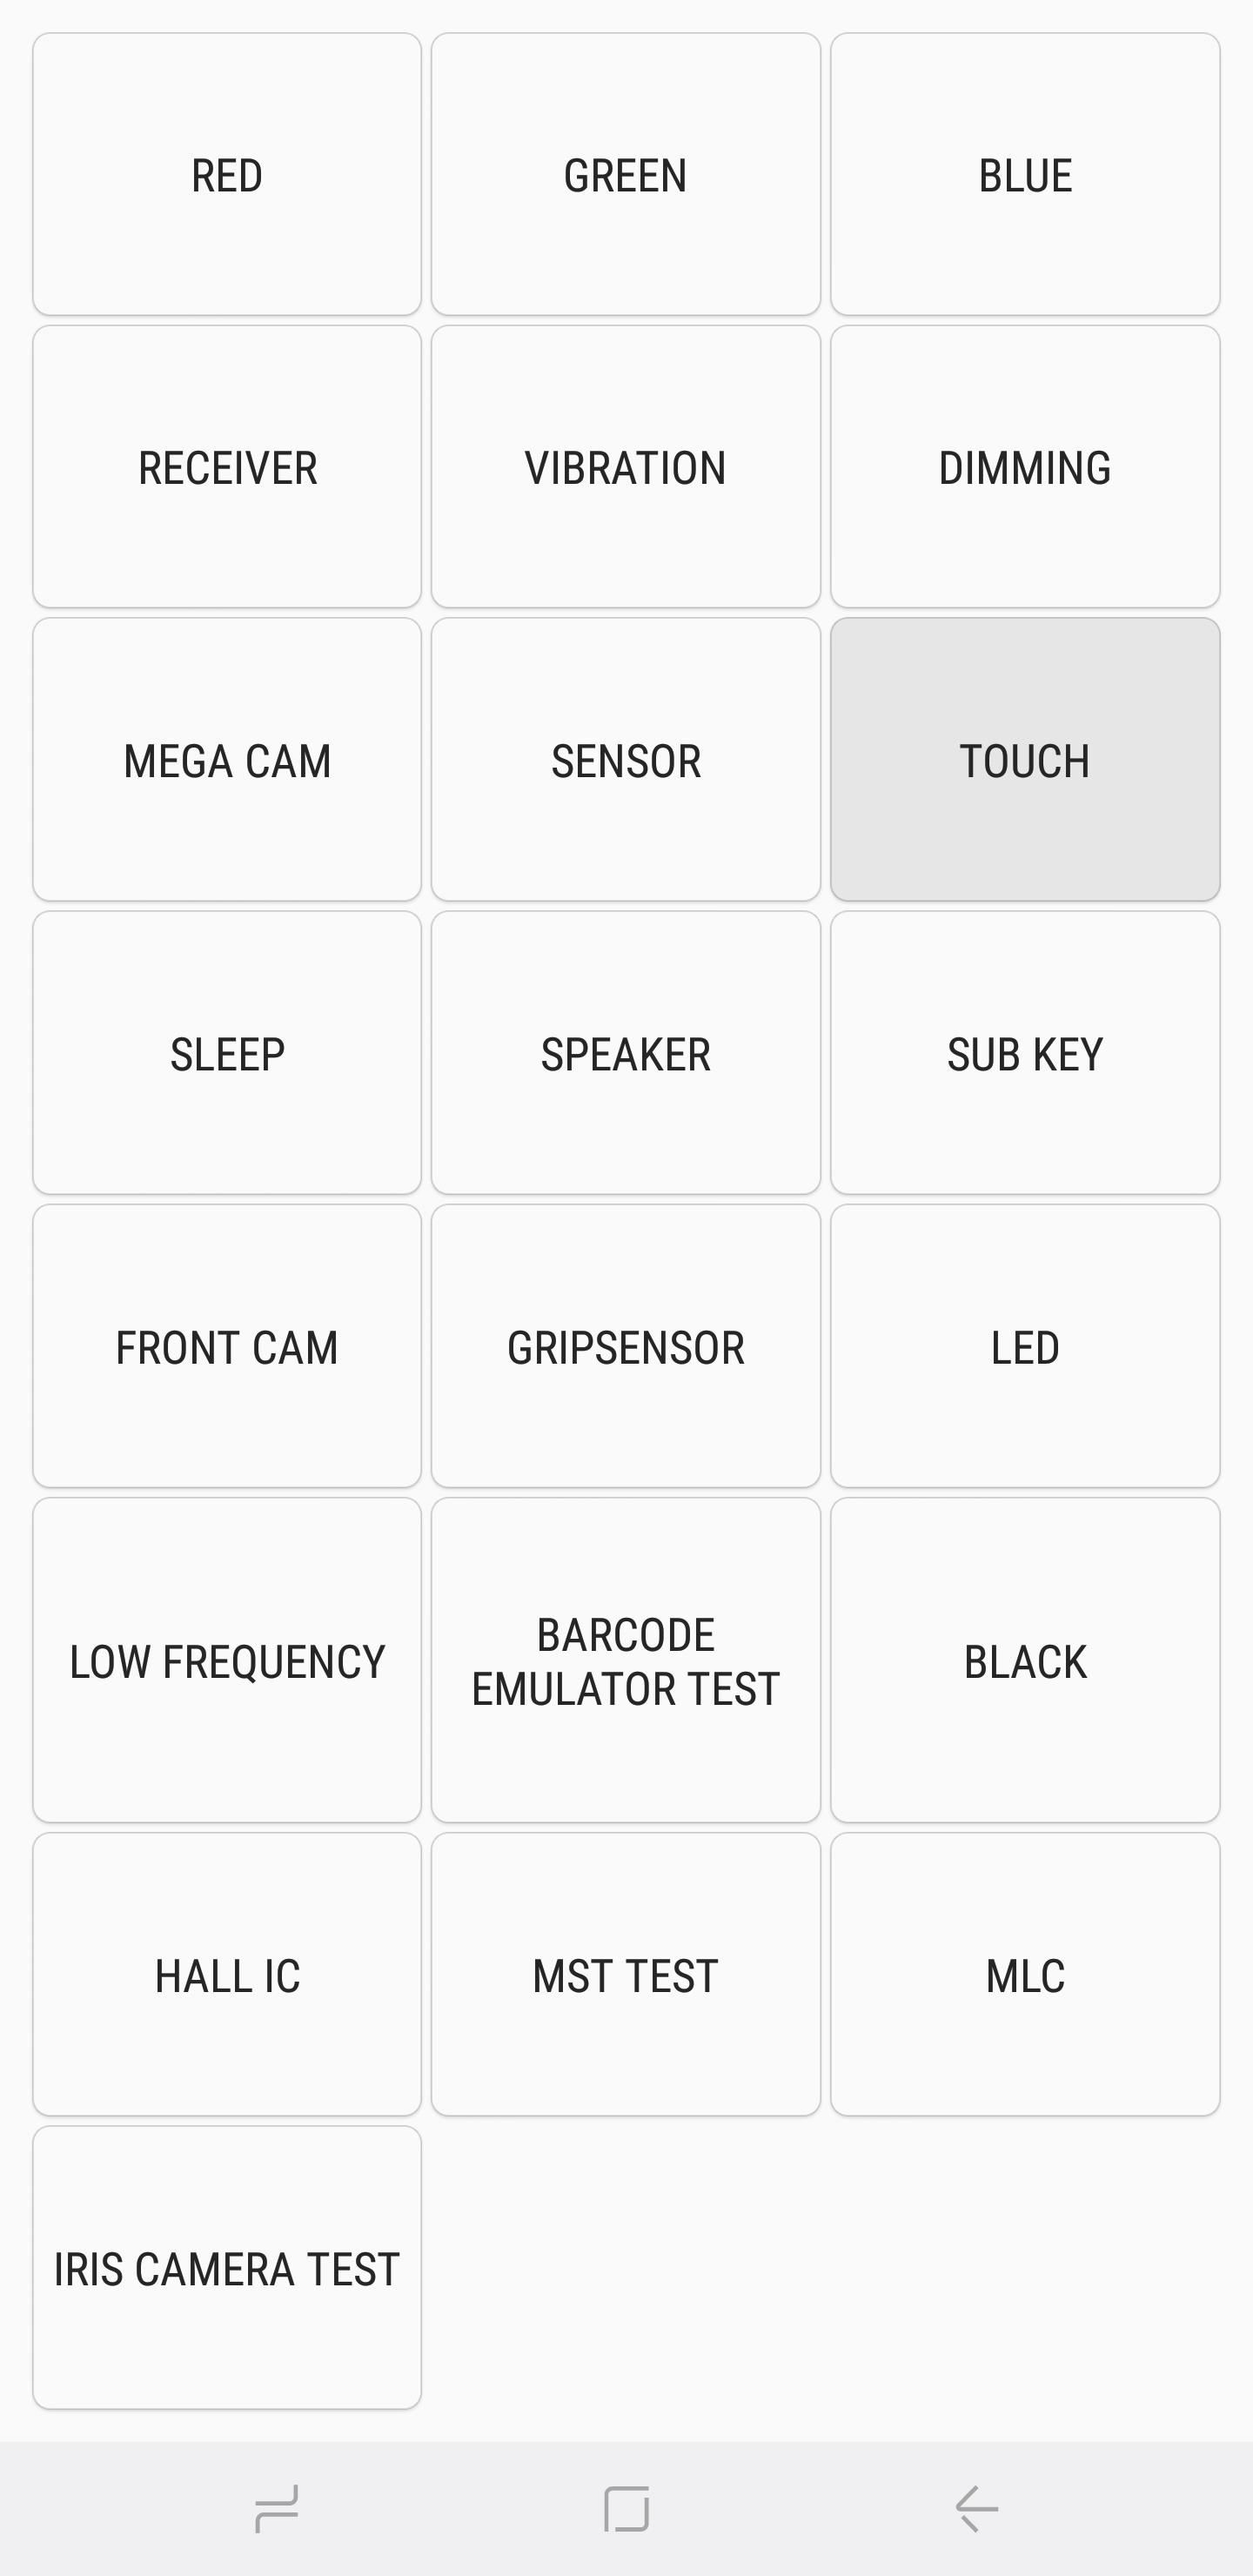
TouchYour phone's touchscreen is easily its most important component you can test, as it's generally required to gain access and interact with your handset. So to test out this functionality and check for any dead zones, tap on the "Touch" button to get started. Now, trace the squares on the screen to complete the X-marked box, which should turn green. Once done, you'll be automatically taken back to the main test page. Alternatively, you can also exit to the main test page by pressing the volume up button.
Sleep & SpeakerTapping on the "Sleep" button will test out your device's sleep functionality. Doing so should immediately put your phone into sleep mode. Once done, wake your phone as you normally would, and you'll automatically be taken back to the main diagnostic page.Tap on the "Speaker" button if you want to test out your handset's audio output, which in turn plays a sample song that you can listen to. Once you've verified that your speakers are good, simply tap on the "Speaker" button again to end the test.
Sub Key"Sub Key" tests out your hardware buttons, along with the virtual home button if you have a Note 8 or S8. Pressing each button changes the screen color to help verify their functionality. Tap on the exit button in the middle of the screen to exit back to the main diagnostic page.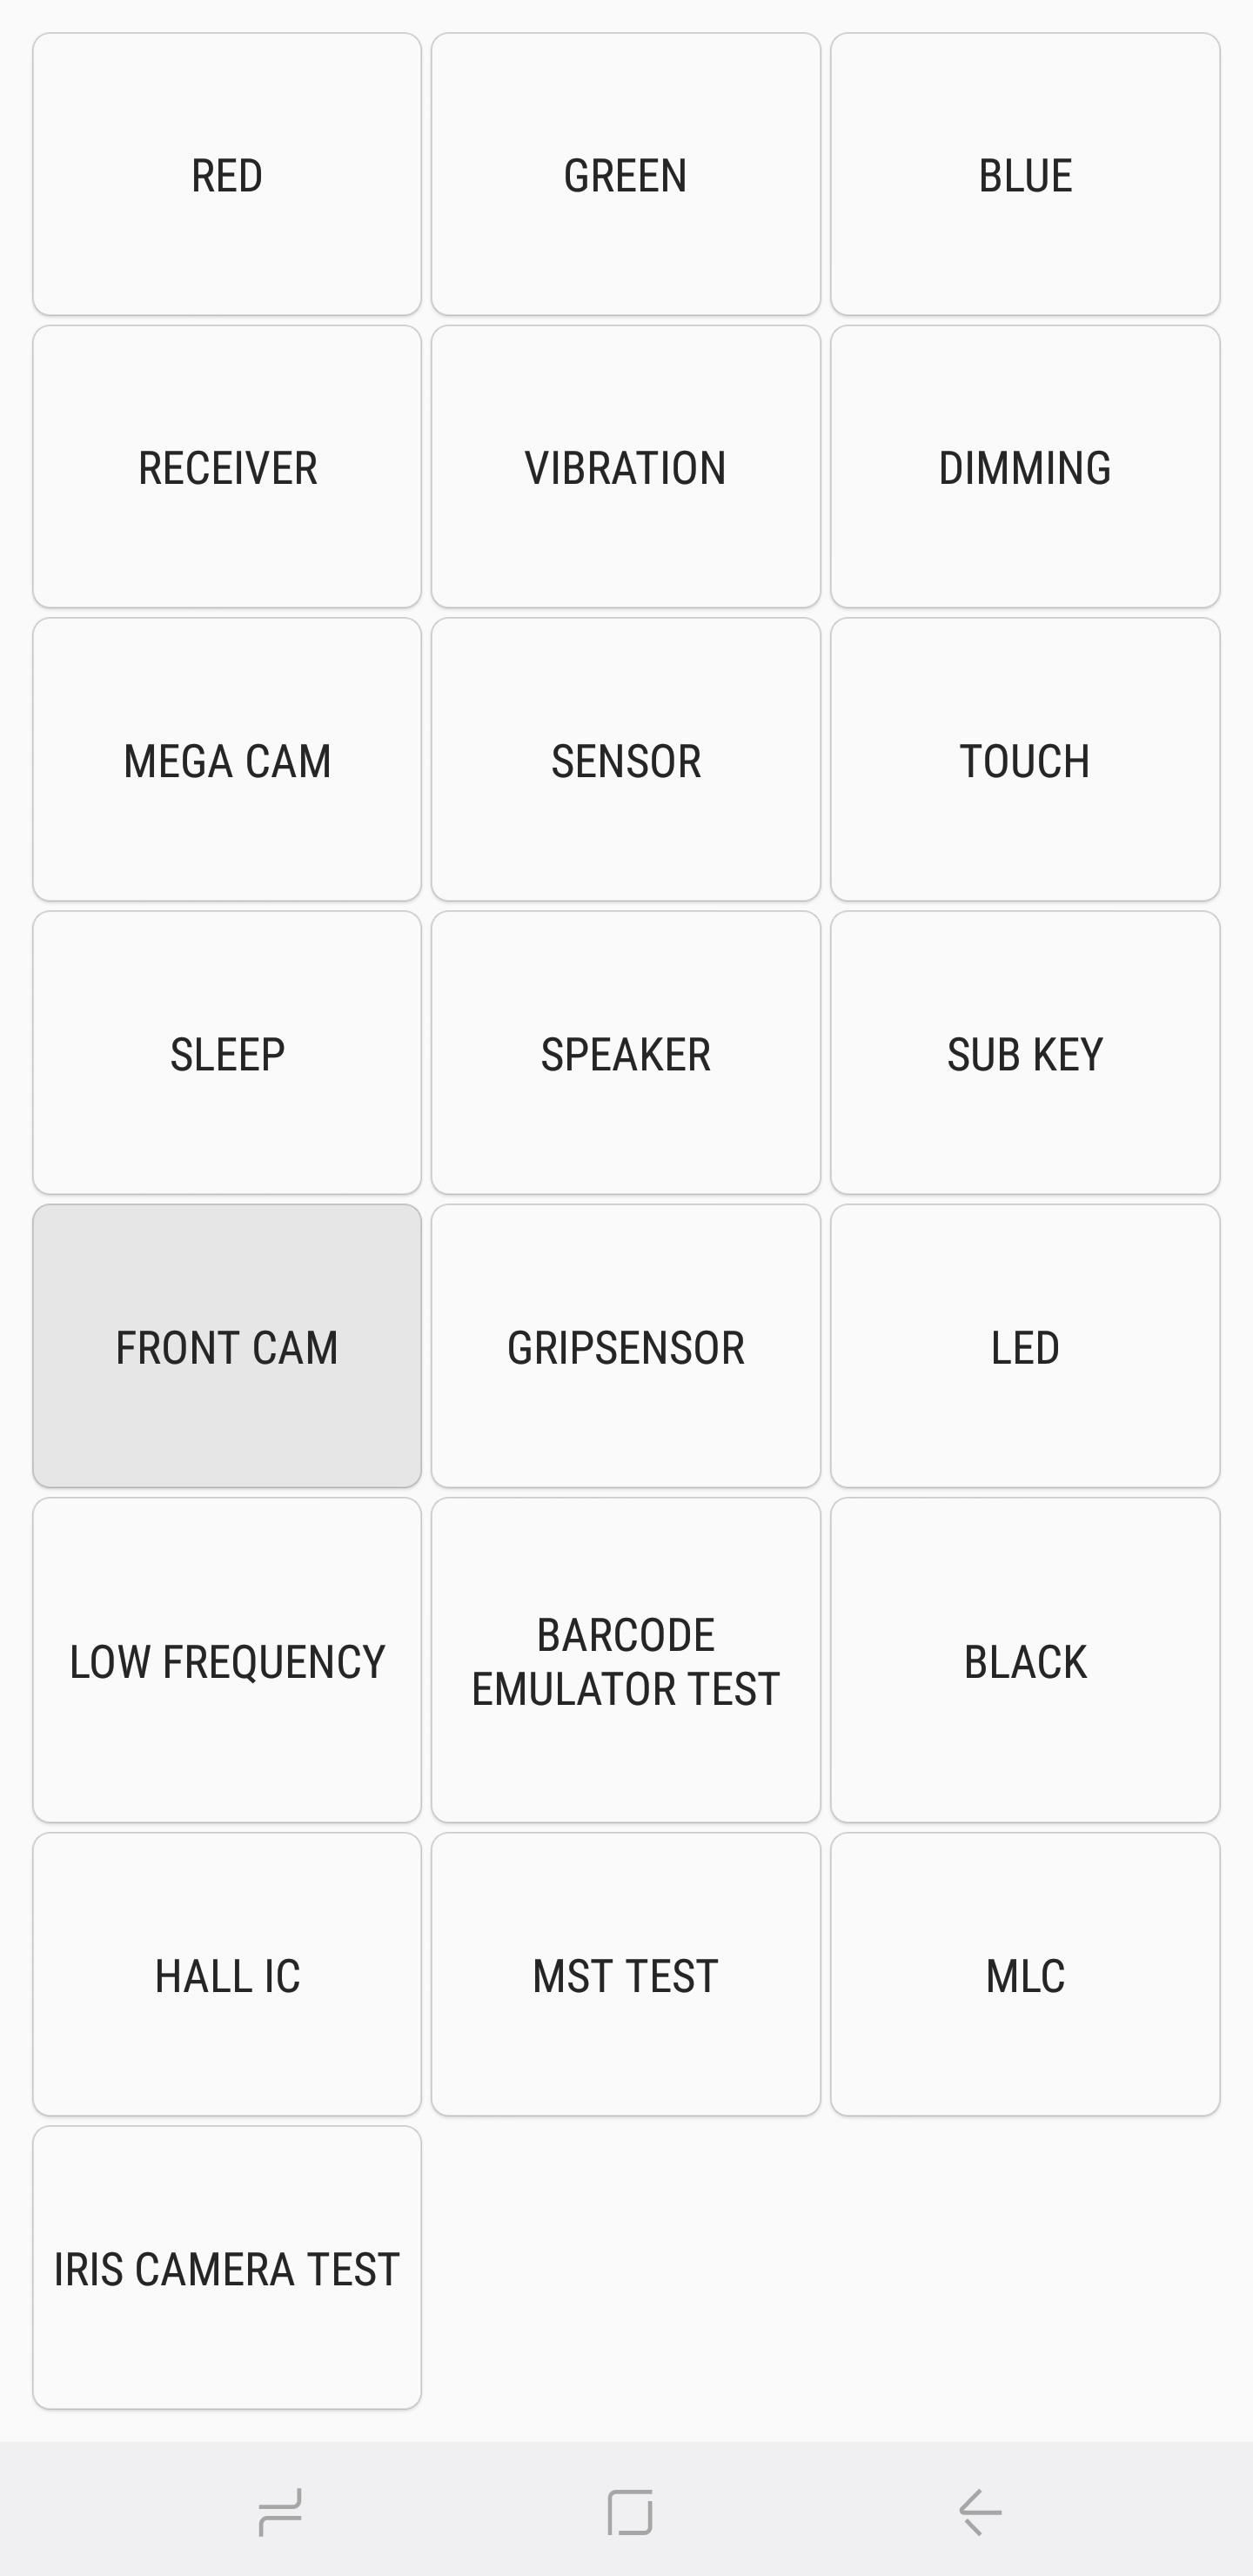
Front CamTo test out your front camera, simply tap on the "Front Cam" button to get started. This will pull up your front camera and let you take a selfie as you normally would. Bear in mind that any test photos you take will automatically be stored in your handset's gallery, so be sure to delete them if they were strictly for testing. Once you're done testing your selfie cam, tap on the back button twice to head back to the main testing page.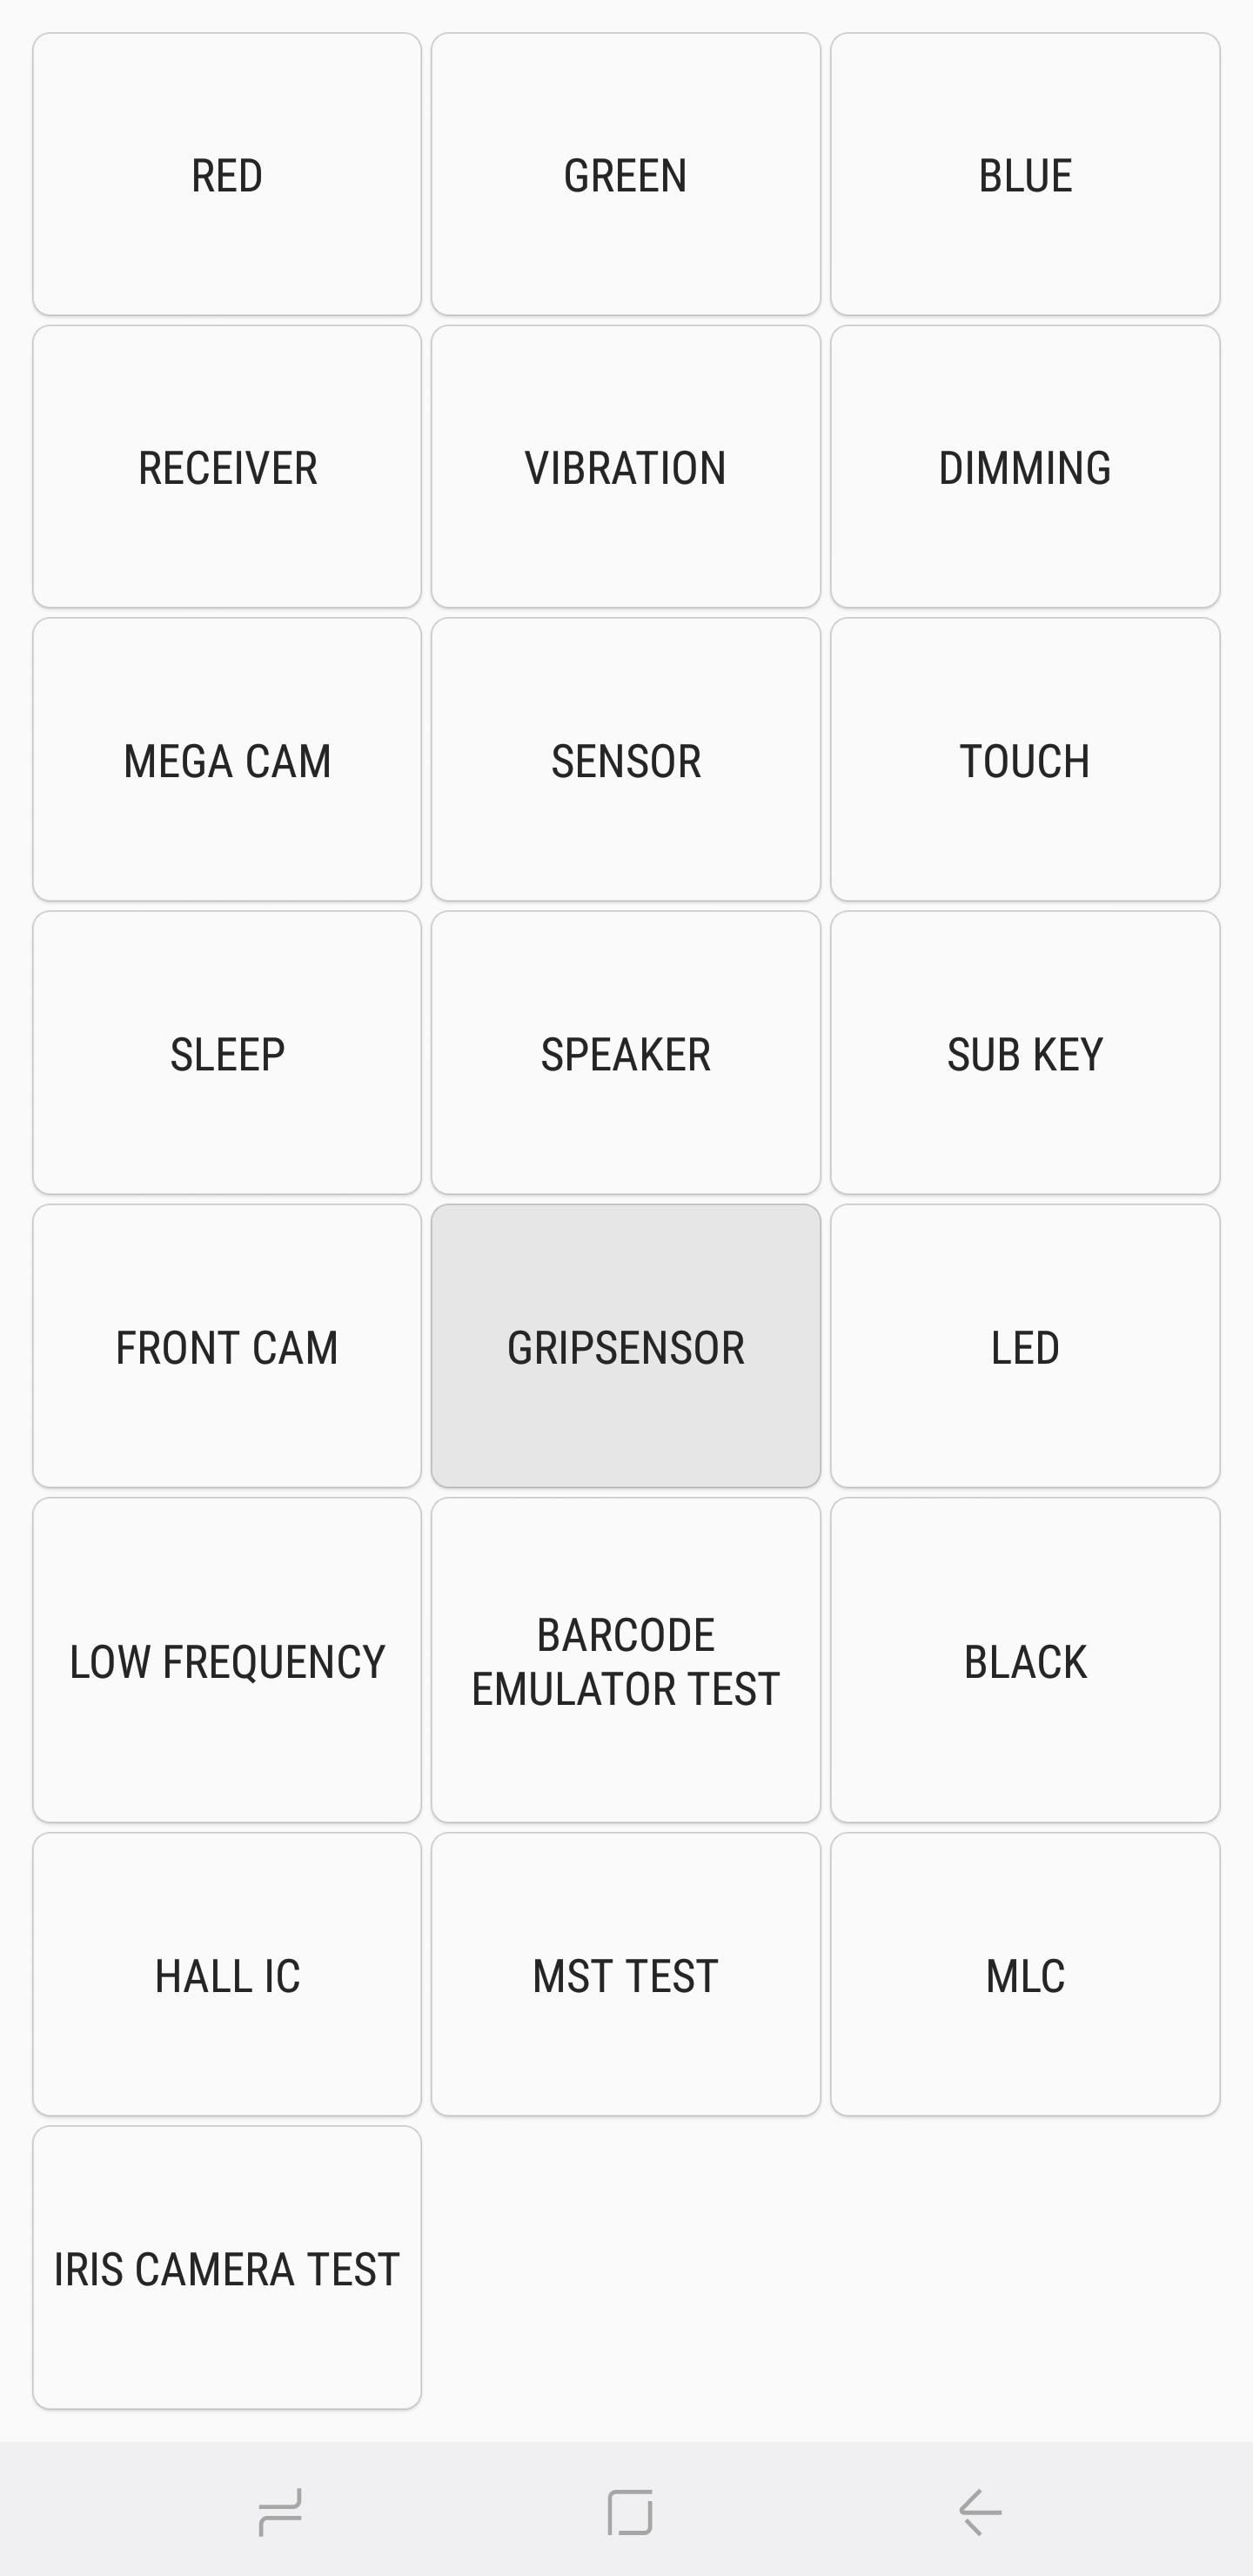
GripsensorChances are your Samsung handset features sensors that detect your grip. To test for this functionality, tap on the "Gripsensor" button, then follow the prompts and release your grip when instructed. You should get a blue screen labeled "Working" if the grip sensor is functioning properly. Once you're done with the test, tap on the back button twice to go back to the main screen.
LED & Low FrequencyThe LED test checks for the functionality of your device's LED notification light. Running the test is straightforward — simply tap on the "LED" button, then tap on the screen to change the LED's color from red, to green, and finally to blue. Tap on the screen one last time to end the test and go back to the main diagnostics page."Low Frequency" tests out your phone's earpiece, and tapping on the button to commence testing will bring you to the "Low Frequency Test" page. From there, tap on 100 Hz, 200 Hz, and 300 Hz and place your ear against the phone's earpiece each time you select a frequency to check for low buzzing noise. Once you've completed the tests, you can exit back to the main diagnostics page by tapping on the back button twice.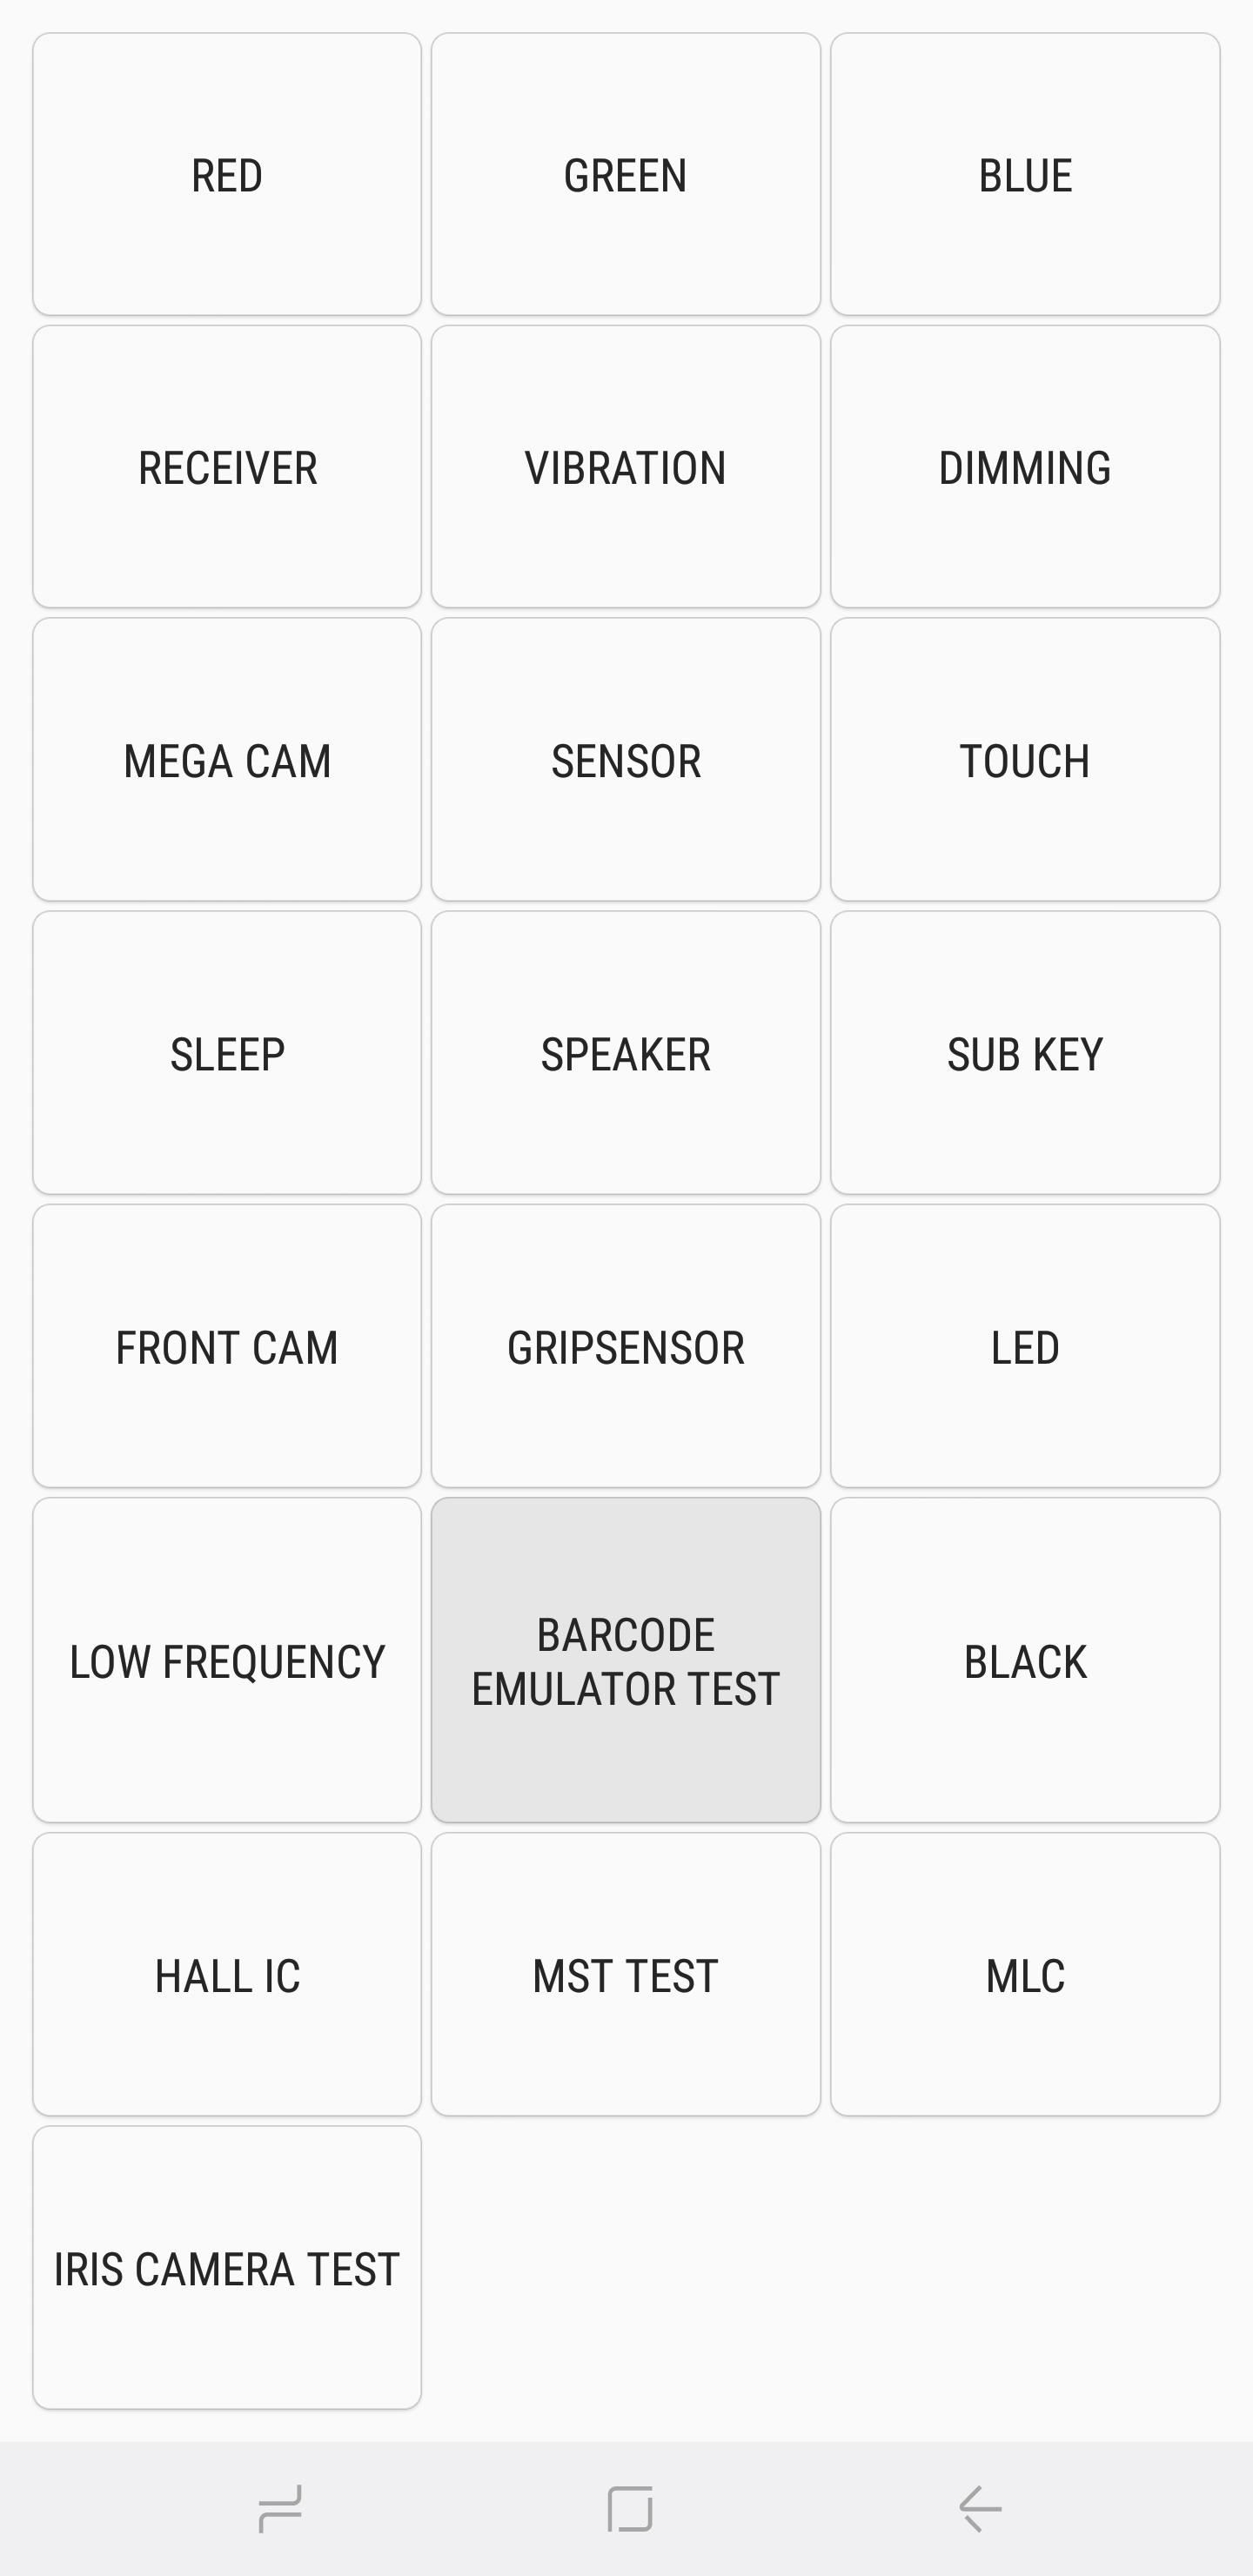
Barcode Emulator TestIf you need to test out your handset's ability to properly generate barcodes, tap on "Barcode Emulator Test." Doing so will take you to a page containing different barcodes. From there simply tap on each barcode, and scan them with a barcode scanner to ensure they're being properly read. Once you're done testing, tap on the back button twice to go back to the main diagnostic page.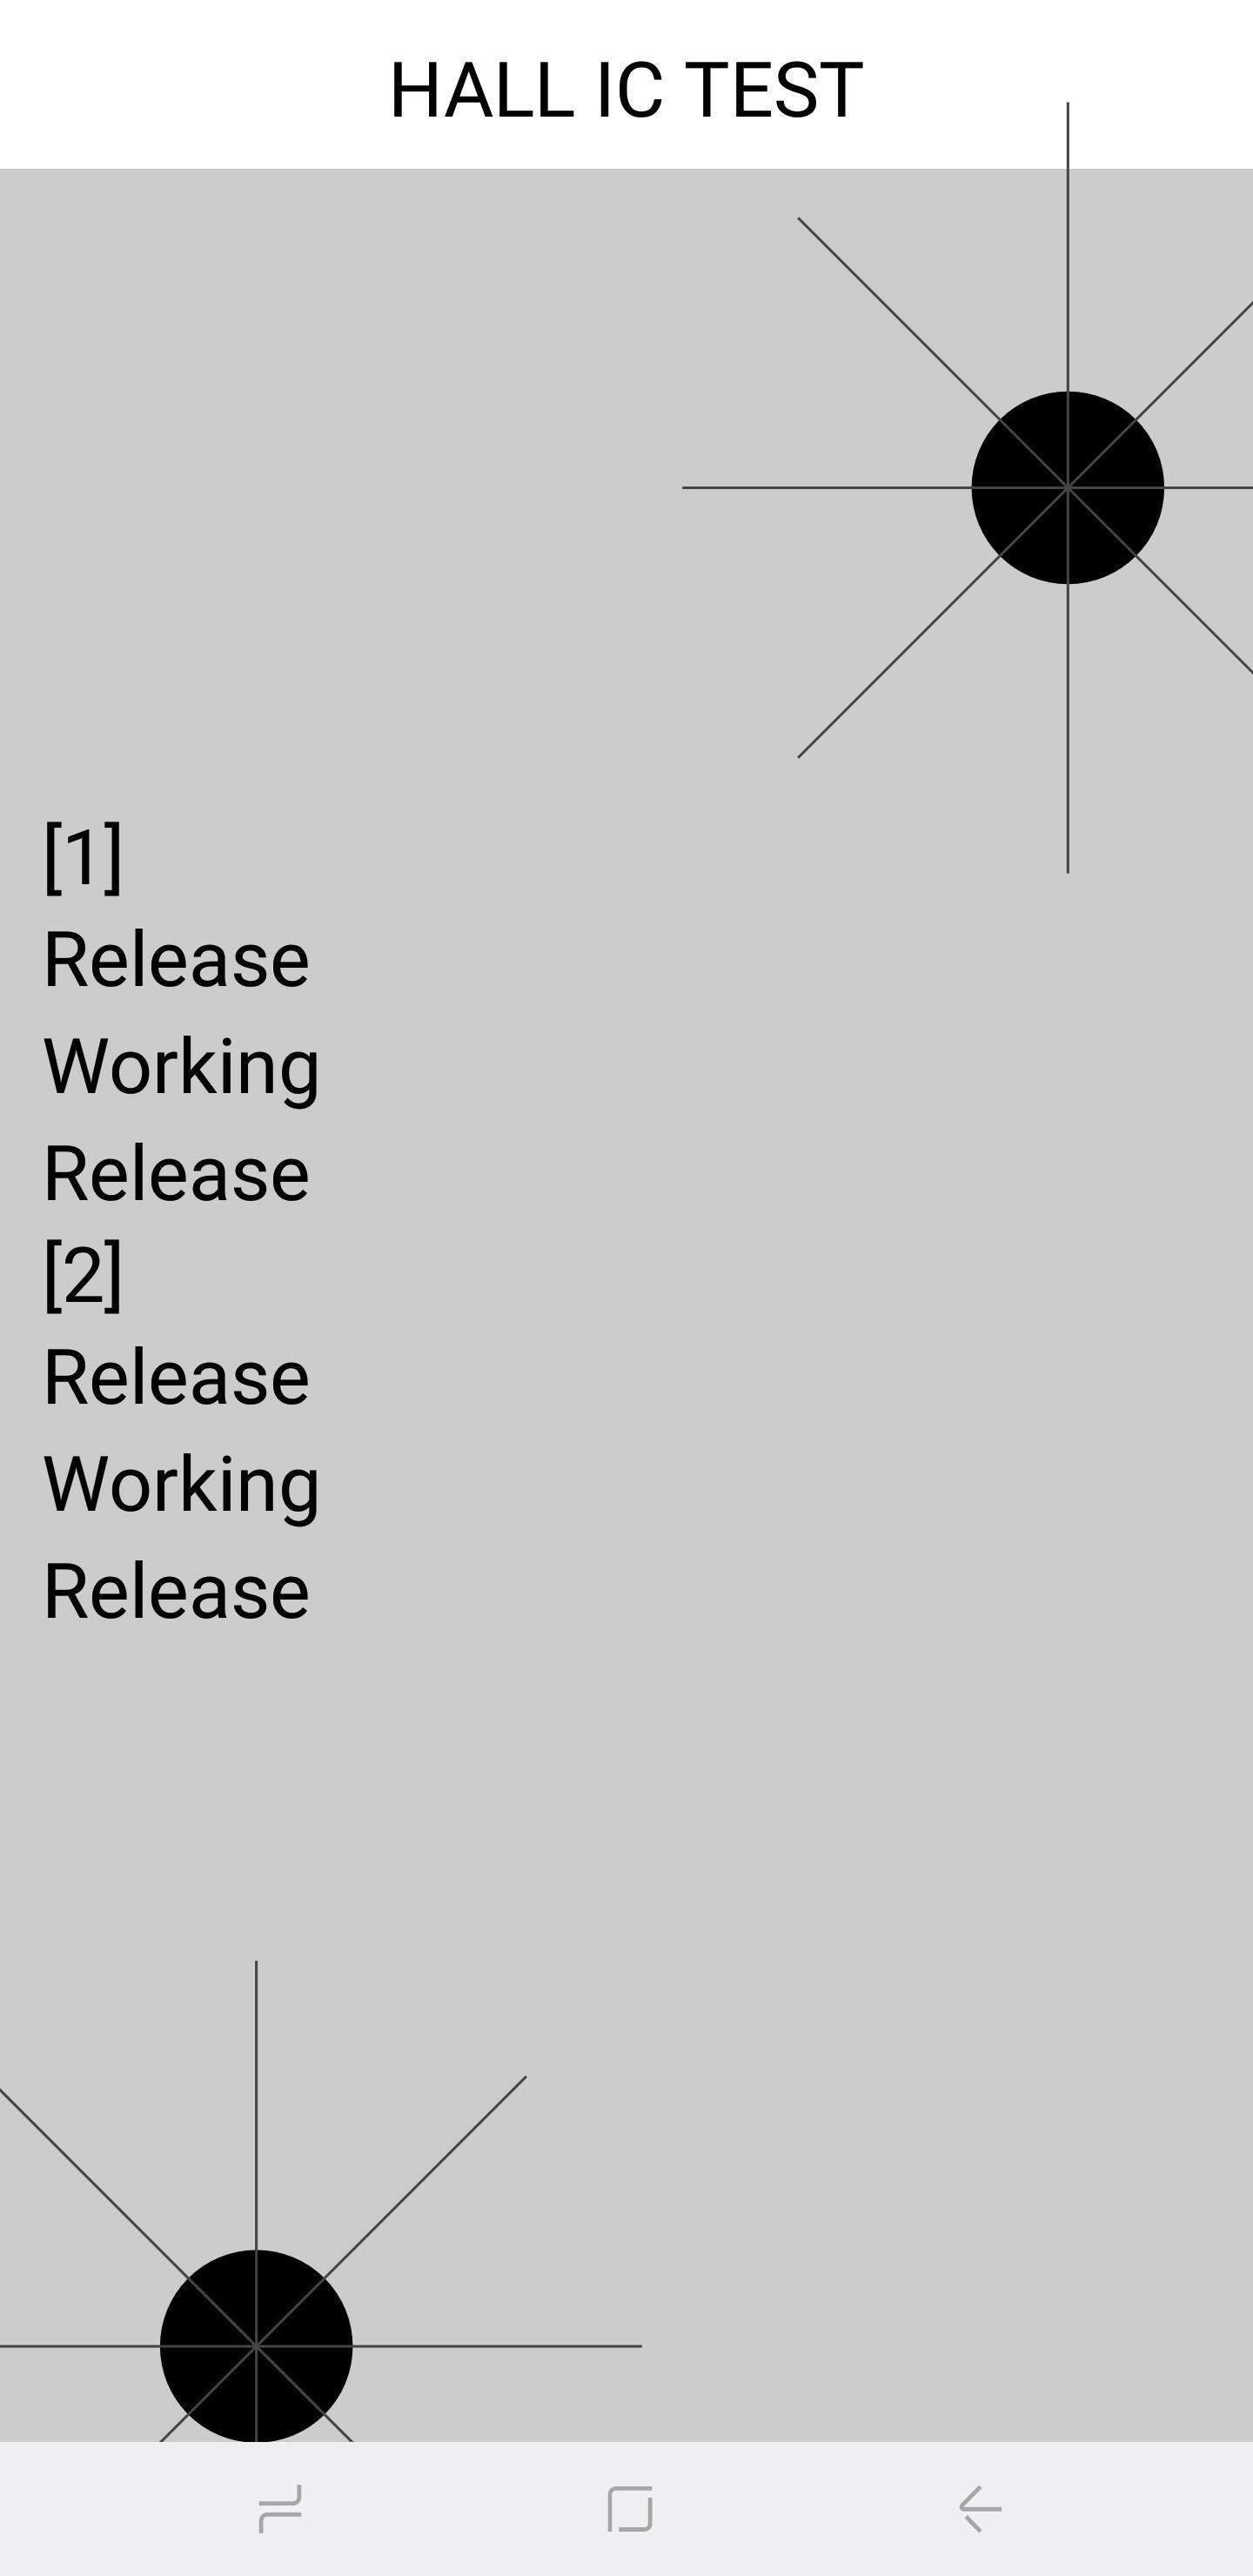
Hall IC, MST & MLC TestsThe Hall IC sensor detects magnetic fields and is primarily used to detect magnetic flip covers to automatically put the phone to sleep when a magnet within the flip cover touches the phone. The test itself doesn't do much and simply gives a confirmation that the Hall IC functions properly.MST, which stands for magnetic secure transmission, enables devices to temporarily read your phone as a credit card. This sensor is essential when using payment services such as Samsung Pay. MLC, on the other hand, is technology that's utilized in fingerprint sensors. There's not much in the way of tests in this area, which seems to be geared more towards developers to tinker with.
Iris Camera TestLast but not least, the "Iris Camera Test" tests out the infrared iris camera that's used to unlock your device. Tapping on the button pulls up your iris camera for you to align your eyes with, and will instantly close and go back to the main diagnostic page once it's successfully scanned your iris.
Exiting Out of HwModuleTest ModeOnce you're done performing your diagnostic tests, you can now exit HwModuleTest Mode. To do so, simply tap on the back button twice to go back to your phone's dialer, then exit from there as you normally would. You're now free to go on with the rest of your day, knowing that all is right with your beloved device!Don't Miss: All the Best New Features in Samsung's Oreo UpdateFollow Gadget Hacks on Facebook, Twitter, YouTube, and Flipboard Follow WonderHowTo on Facebook, Twitter, Pinterest, and Flipboard
Cover image and screenshots by Amboy Manalo/Gadget Hacks
No matter how expensive or cheap a pair of headphones are, the sound can get buggy, the wire can get cut, or the headphone jack itself can be broken or ripped off the cord. But instead of buying a new set of headphones or borrowing the ones from your cousin with the earwax problem, you can easily fix it yourself.
Everything You Should Know About the Moto G7 « Smartphones
The idea of translating in real-time has become quite popular recently, with Google's Pixel Buds integrating the feature. However, their implementation is audio-only. Until recently, you needed to download a frequently-unreliable third party app to translate text using your camera — but that all changes with the Galaxy S9 and Bixby Vision .
Samsung S9: How to Translate Languages in Real Time
Sprint: Sprint has already rolled out RCS Universal Profile, though to take advantage of it you'll need a supported device — and you'll need to be talking to someone with a supported device too.
What is RCS messaging? Here's all you need to know - Yahoo
The expected deviation of the new optical clock is 1 second in 15 billion years. Why Do We Need Atomic Clocks? Some 400 atomic clocks around the world contribute to the calculation of International Atomic Time (TAI), one of the time standards used to determine Coordinated Universal Time (UTC) and local times around the world.
How to calibrate your TV to get the best picture possible A few simple adjustments can help your TV produce a more accurate picture. We'll show you how.
how to change color saturation on monitor - Microsoft Community
On an Android device, we will find plenty apps who run in the background. Those apps consume our battery, data, and our phone's resources. In this guide, we will see all the possible ways, with which we can say "no" to auto-starting apps on Android.
How to Automatically Close Background Activities in Android
How to turn off (or turn on) landscape mode on the iPhone 6
2. Delete apps you don't use. On a related note, if you're one for downloading apps and games and getting bored after five minutes, make sure they're not still clogging up your phone's storage.
How to manually control your iPhone's cloud photo storage
AppsGeyser Product Tour from Andrew Kudrin on Vimeo.. Once you've made your app, you can upload it to the Android Market or download it. This method of making Android Apps is especially great if
Appy Pie - How to make an app in 3 easy steps | App Builder
How To: This Innocent Calculator Is Really a Secret App Safe for Android How To: Secretly Monitor Text Messages on Your Galaxy S4 or Other Android Device How To: Carrier Unlock Your Samsung Galaxy S4 So You Can Use Another SIM Card
Hide All Traces of Your Apps & Pictures on Android - Gadget Hacks
Today, we explain how to make a parabolic microphone. These are usually only seen in spy movies, but they are very real and very effective. You can easily make a homemade parabolic microphone but first, let's explain a bit about what they are and how they work.
Do-it-Yourself Parabolic Microphone | eHow
It's hacking in the old-school sense, covering everything from network security, open source and forensics, to DIY modding and the homebrew scene. Damn the warranties, it's time to Trust your Technolust. In this episode, see how to session hijack with a pineapple. Session Hijacking with a Pineapple, Hamster and Ferret and cell phone?
Session Hijacking with a WiFi Pineapple in Windows
0 comments:
Post a Comment